Adventure Nomad

Adventure Nomad

Wednesday, May 30, 2007

Sea Cave Canoeing


Thailand is one of my favorite countries. It has a rich culture, a proud and friendly people and a funky nightlife (you mean that girl is really a GUY?).

If you are planning a trip to Phuket, try this three-day canoeing trip that we did in 2000 within the Phang Nga Marine National Park (a World Heritage Site). We organized the trip so that each of us would have our own canoe, but paddling is optional, and is normally done by paddlers who accompany you on your canoe.

This was essentially a private tour – just the two clients, our guide and the boat driver. Our guide took us to a different area each day, so we saw lots of different caves as well as some tourist type places like the floating village and ‘James Bond’ Island and we got to paddle in the Talane Mangrove Forests – reputed to be the most beautiful in all of Thailand.
The sea caves are the result of natural erosion of limestone islands, which rise out of Phang Nga Bay. There are more than 300 of these beautiful and spectacular islands, which helped to make this area a World Heritage Site. It is sometimes very tight to squeeze into these caves, which can open up into a ‘Hong’ – a lagoon caused by the collapse of the cave roof, which can happen naturally over time.
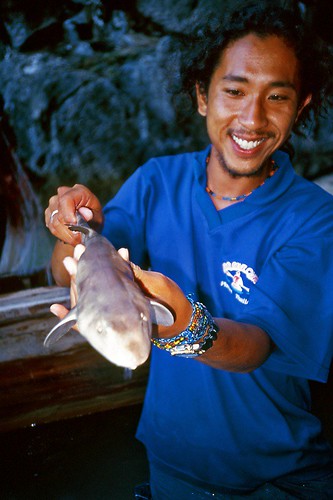
a>We spent the nights in simple bungalows and ate terrific Thai cuisine at every meal. This was, what we consider to be, a ‘must do’ trip. Highly recommended!

Photo information: All pics are scanned prints taken with a Canon Prima AS-1, a waterproof camera with a fixed 32mm lens.
From top: Longtail Boatride to the Floating Village;
Guide Briefing us on the Trip:
Unloading the Kayaks at the Talong Mangrove Forest;
Kayaking 'Hong' Island;
Squeezing into one of the Sea Caves;
On The Dinner Menu - Our guide holds up a dogfish caught by local fishermen;
Simple Bungalows for the night.

Saturday, May 26, 2007

Nikon D80 vs D200

I did it again. I walked into my local camera shop, ready to plonk down some hard earned cash for a Nikon D80, when I picked up the D200 again. There’s no denying the appeal of this camera for an outdoorsy guy like me. It’s tough, weatherproof exterior reminds me of the bombproof pro film bodies, rather than the delicate, high-tech machines we see so many of today. I wanted one, and I walked out of the shop empty handed once again, plagued by indecision.

My present camera body is getting on. It is two years old now. Its aging body has been covered in dust and fine desert sand, sweated on, and there’s a dent on the top where I dropped it onto a concrete floor. It is the accumulated wear and tear and internal corrosion that gives our cameras problems. Galen Rowell used to replace his lightweight film bodies every year before they started to give him trouble. I figure my present body is overdue for replacement. I’m not that diligent about replacing my aging camera bodies, hence the argument for a tough, weatherproof pro body like the D200.

On the flipside, the weight of that extra protection adds up and the D200 is significantly heavier than the D80. The batteries also don’t last quite as long, which means I’ll have to carry more of them into the backcountry. There are other differences, such as speed and customization, but the weight and shorter battery life are my big concerns.

Any comments?

Monday, May 21, 2007

The Good Stuff

I love new gear! Part of the fun of preparing for a trip is the chance to shop for new gear. In preparing for my upcoming trail run in Nepal, I’ve put up this small list.2007 Salomon XA Pro 3D XCR
Replaces: 2005 Salomon XA Pro 3D
As a former Salomon supported athlete, I’ve had about 10 pairs of the various versions of this shoe through the years, starting with the 2002 XA model to the current 2007 XA Pro 3D XCR. This is basically the goretex version of the shoe I used to run the Gobi Ultramarathon event in 2005. I’ve never been a big fan of Salomon’s lacing system. Although it has the advantage of being really fast to lace up, the little plastic lace lock is prone to failure, and it’s not easy to repair on the go.

In general, I’ve avoided Goretex lined shoes because of poorer ventilation. However, in the Gobi Desert race, a lot of the more experienced competitors who showed up in goretex shoes had fewer problems with blisters as the goretex helped keep the fine desert sand out of the shoes. Another caveat with goretex shoes is that if water goes in, it stays in. So if you are going in and out of water (which happens a lot in some races), you’ll need to stop to drain the shoes or run with heavy waterlogged shoes until they dry out. In Nepal, there is some piss and shit from beasts of burden like water buffalos and Yaks that gets mixed in water that washes down the trail, and I felt the goretex would come in useful in keeping some of that crap out of our shoes.

2007 The North Face Skareb 40 Backpack
Replaces: 2005 Gregory Advent Pro
There was nothing wrong with my Gregory pack, except I got it in the wrong size (I got a Large, I should be a Medium). I haven’t test out the new pack yet.

2007 The North Face Prophecy Jacket
Replaces: 2002 Marmot Precip Jacket
My Precip Jacket started leaking along the back of the shoulders (presumably from the rubbing of my backpack) and the neck after one season. The North Face Prophecy appears more durable and is only a half-ounce heavier. The trimmer ‘athletic’ cut also fits me better, and I look good in it, and that’s the real reason I bought it. Also not tested yet.

2007 Marmot Evolution Glove
Replaces: Kathmandu Yak wool, acrylic, polypro, or whatever gloves I can find
This is the first high tech pair of gloves I’ve bought not specifically for mountaineering. It seems to have good reviews, so I bought a pair to try out.

Gear that’s tested, and is still good:

Buff
Pronounced 'boof', this tubular piece of microfiber is now a standard item in my pack. What’s it for? Beanie, scarf, handkerchief, pot-grabber, smog-mask…

Marmot Driclime Windshirt
Although the shirt tails and non-elastic cuffs look a bit dated, this lightweight (10 ozs) jacket is still the outdoor standard in terms out lightweight, versatile gear.

Montbell Alpine U.L. Down Hugger #5 Sleeping Bag
This sleeping bag has a weird name, but it uses very high quality 800 fill down, weighs only 1 lb and packs up insanely small. It’s rated to only 40F (+5C), but I can usually borrow a blanket from the teahouses I’ll be staying at. If I get nervous, I’ll buy their #3 Sleeping Bag which is rated to 30F and weighs about a half pound more.

Photo:
Top: '05 Salomon XA Pro 3D looking out at the Gobi Desert

Friday, May 4, 2007

RAW: Revisited

I’ve just returned from Joshua Tree National Park in Southern California for a week of ‘fun in the sun’ rock-climbing. I brought my trusty 350D along for the ride. While I normally shoot JPEG, I know that pro outdoor sports photographers like Michael Clark and Seb Rogers, whose work I like and admire, are strong advocates of shooting RAW. I decided to give RAW another look.

All is not well though. The biggest frustrations are the long loading times for each and the increased amount of storage
memory used. The main benefits for me shooting RAW are the flexibility to manage white balance and the increased latitude in controlling exposure of high-contrast images in post-processing. I’d like to continue to experiment with RAW for a while. The details of my RAW workflow are below and if somebody can offer any comments on how to improve it or any tips and advice, I’d appreciate it.

My RAW workflow starts by downloading all the images from my camera into iPhoto 6. Trash all the non-keepers. Then I get to work on the keepers. I transfer each image to Photoshop CS2, mostly using the default settings with Adobe Camera RAW except for white balance. Then, I open the image in Photoshop CS2. I crop and straighten the image, adjust the black and white levels, use the Shadows/Highlights tool if it needs it, apply curves, saturation, sharpen, convert to sRGB and, lastly, save as a JPEG file.

Let me know if you have any other ideas.

Photos:
Top: Early One Morning in J-Tree... this low contrast image was captured in RAW and required very little post processing. Taken with a Canon 350D, 10-22mm
Middle: Trad Rack and Friend. This high contrast imaged captured in JPEG required some post processing to tone down the harsh highlights and bring out the dog lying in the shadow of the boulder. Taken with a Canon Ixus 850 IS.