Adventure Nomad

Adventure Nomad

Sunday, December 26, 2010

Adventure Photography Part IV: Advanced Tips

This is the last part of a series of articles to help travel and adventure photographers bring home better images.  In Part I, we looked at cameras for adventure and travel photographers; in Part II, we looked at some techniques; in Part III, we looked at Post-Processing; and in Part IV, we will conclude this series with some Advanced Tips.

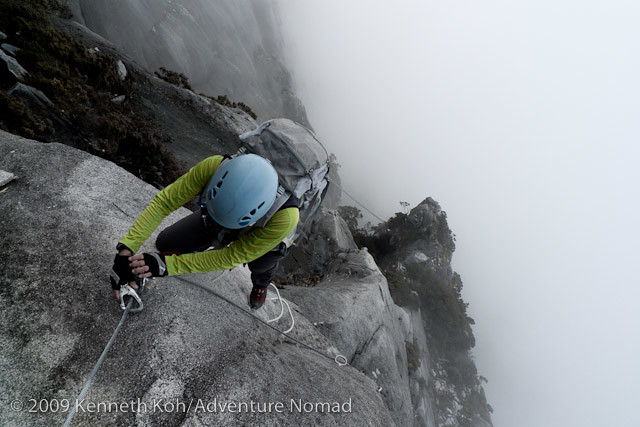
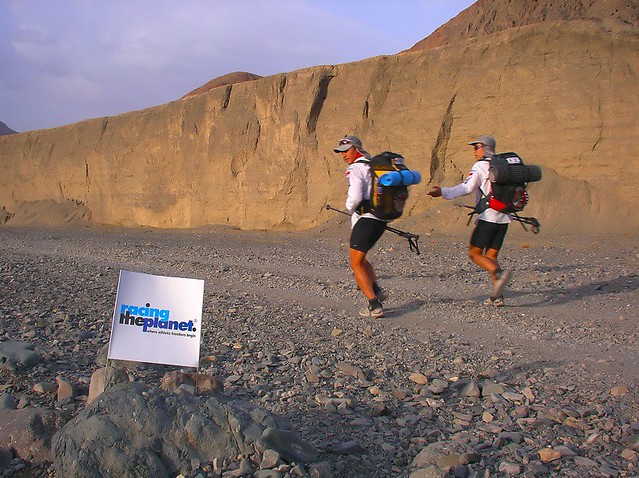
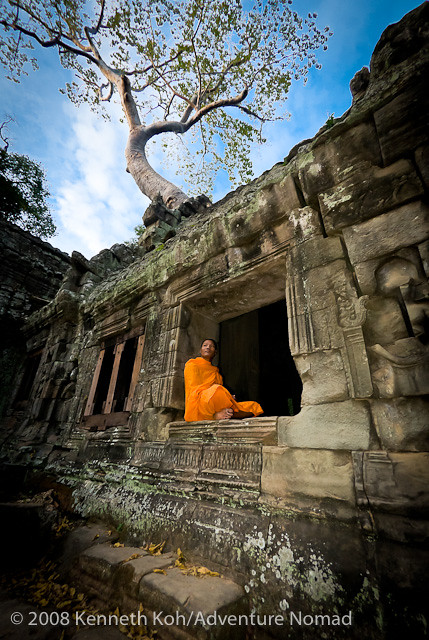
This is Tuol Sleng prison in Phnom Penh, Cambodia, a place where thousands were tortured and killed by the ruling Khmer Rouge in the late '70s.  Before I shot this, I knew I wanted to preserve the somber mood by making a gritty image in black and white.  I wanted the barbed wire to stand out against the white building and sky.  I stopped down (used a small aperture) to keep the barbed wire and building sharp.  The guy in orange walking in the corridor was a bonus.  Orange is the color the monks wear, and is the color of hope.  I kept him in color.  Nikon D300, 18-200mm, -1/3EV, 1/1000, F/16, ISO800

Previsualization
It is said that cameras take snapshots, but photographers make photographs.  What's the difference?  Let's say you walk up to a pretty scene, you say "that's nice", whip out your camera and take a shot.  That's taking a snapshot.  On the other hand, if you walk up to a pretty scene, and say "that's nice, but this scene would really look better if I could change my position to get lower (or higher, or closer to the subject), and if I came back at sunrise (or sunset).  And what would really nail the shot is if I change lenses and use a really small aperture to maximize depth of field, etc...".  That's making a photograph.

Previsualization is having an idea of what you want the photograph to look like, and then going out to create it.

There's nothing wrong with taking a snapshot.  Some great photographs are just found that way.  But most other times, we have to work at it.  The best way to learn previsualization is to study the photographs of others and yourself.  How is the final image different from yours?  How did they make the shot?  What lens did they use?  What aperture/shutter speed?  How was the light?   What would you have done?

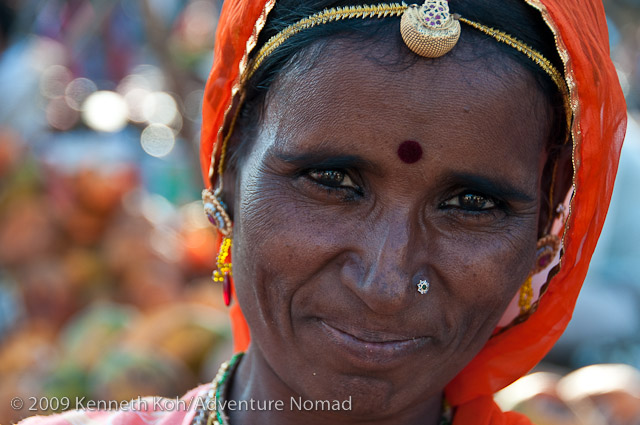
Wedding, Delhi, India.  I don't really know if this image is good or not, and this would be a good example of a shot I would want to have critiqued.  I like the emotion in the dancer's face, but certainly there are a lot of distracting background elements that I wish weren't there.  Nikon D300, 12-24mm, 1/125, F/4, ISO1600.

Photo Critiques
A photo critique is a written or verbal evaluation of a photograph based on careful observation to garner feedback about your images with the goal of improving them.  Getting your photos critiqued doesn't have to be a painful, ego-busting experience.  There are plenty of photo critique websites, and most of them are very supportive.   It's a great learning experience.

These prayer flags at the top of Poon Hill in Nepal were fluttering around.  I was trying to capture the rising sun and Machapuchare peak between the flags.  The sun is a little higher in the sky than I would have liked, but otherwise, this is the shot that I was going for.  Nikon D300, 18-200mm, fill-flash.

Composition
We've all heard the 'Rules': The rule of thirds, the 'level horizons' rule, the 'get closer to your subject' rule, the 'watch your edges for intrusions' rule, the 'less is more' rule...  and we have all heard the phrase 'there are no rules', so which is it?  Quite frankly, these 'rules' do have a place in photography, especially for new photographers looking for guidance.  Having said that, travel and adventure photography is generally very dynamic, and you may not have the luxury of time to place your subject according to the rule of thirds, level your horizon, move closer to your subject, while watching the edges of your frame, and simplifying your image.

The rules are best left to analysis or photo critique after the fact, and used to build up photography experience and develop compositional 'instincts'.

When I look through the viewfinder, I'm just seeing shapes, lines, color and flow.  I move these elements within the viewfinder until it looks good to me, and then I shoot it.  I don't really analyze stuff when I put the viewfinder up to my eye, it's more 'feeling' and 'emotion'.  The hard thinking is done in the previsualization phase before I lift up the camera to my eye.

Trekking the Annapurna Circuit, Nepal.  Taken near mid-day when the sun was high in the sky.  I made a back lit shot for added drama, stopped down (small aperture) to get a nice sunstar, and waited for a trekker to walk into my picture.  Nikon D300, 10.5mm, 1/400, F/20, ISO200.

Light
There are a lot of different lighting conditions, and each has a different emotional response.  Light has:
Direction (front, which is normal and; side and back light, which is dramatic);
Quality (diffuse or soft, and hard); and
Temperature (warm which is golden or red, and cold, which is bluish).

I'm an editorial shooter, and my job is to grab an editor's attention with bold, punchy images.  But I don't have the luxury of time to wait until the light is perfect to shoot what I want.  So I do it the other way.  I shoot what the light allows me to.  At sunrise or sunset, when the light is warm and the shadows are long, I can get dramatic scenic or landscape shots.  When it's overcast, I'll try to get some portraits or close-ups.  At mid-day, I can get shots with some bold color, but I'll need to watch the shadows or tone them down with some fill flash.

Rules?  We don't need no stinkin' rules! Get out there and play!  This is Ginger, my golden retriever, reaching for her favorite toy.  I was playing with my new camera and underwater housing.


Play
The last thing you need is someone telling you how to have fun, and really, that's what photography as a hobby is all about.  Sure, its good to want to be better, but at the end of the day, (if you don't have clients or editors ;o) the only one you need to please is yourself, so get out there and shoot!

Monday, December 13, 2010

Confessions of a Peak Bagger

"Mountaineers consider routes, peak baggers count summits."
Bagging Alexandra Peak, Mt. Kinabalu Massif, Malaysian Borneo.  Photo courtesy of Jack Chen.
What's a peak bagger?  It's a somewhat derogatory term used by 'real' climbers to describe a person who has no real interest in the technical difficulty of the route by which he ascends a mountain.  The primary goal of a peak bagger is to reach the summit (or a collection of summits), usually by the easiest possible route, and usually for the purpose of 'bragging rights'.

I must confess that in wanting to climb Mt. Everest, I have become a peak bagger.  This really shouldn't come as a surprise, as I feel most climbers (myself included) choose to climb Everest not for the aesthetics of the route, but more for 'bragging rights'.   

Heck, if there was an easy way up the mountain, I'd take it.  The thing is, there is no easy way.  The altitude makes any physical activity difficult, and even with supplemental oxygen, humans are at the limit of physical endurance near the summit.

I've chosen to climb up the North Ridge, from Tibet, next Spring.  This is one of the 'standard' routes up the mountain, the other being the South Col route via Nepal.  In terms of technical difficulty, they are about the same.  But in terms of danger, the North Ridge surprisingly trumps the South Col.  Even though the single most dangerous place on the mountain is the Ice Fall near the bottom of the South Col route, statistically, the North Ridge is twice as deadly as the South Col (Source: The Deadly Side of Everest, Alan Arnette, 2009).

I don't have a death wish, and the statistics are what they are.  The decision to climb from the North has more to do with marketing (and sponsors), as no Singaporean has successfully climbed Everest from the North.  So in just a few short months, Singapore's top long distance female triathlete, Esther Tan, and myself, will be heading off to climb the North Ridge of Everest with the sole prupose of 'bagging' the big 'E'.


Friday, December 3, 2010

Adventure Photography Part III: Shooting RAW and Post Production

This is Part III in a series of articles to help travel and adventure photographers bring home better images.

Low's Peak Via Ferrata, Malaysian Borneo.  I applied a desaturation effect in Lightroom to maintain the simple clean lines in the image.
I was a die-hard JPEG shooter when I wrote this article 'Optimize Your Camera Settings'.  At the time, I thought shooting RAW was complicated and I wanted to keep things simple by shooting JPEG, and letting the camera 'process' my shots for me.  Pro Mountain Biking photographer, and fellow blogger, Seb Rogers, talked me into giving RAW a shot.  I'll be frank: It was a struggle, with a steep learning curve.  But, if I knew then what I know now, it might have been a lot easier.

Monk at Ta Prohm, Cambodia.  This is one shot that would not have been possible with JPEG.  The monk is sitting in shadow, but I was able to bring back some detail in his face with some creative work using Adobe Lightroom.

The Problem with JPEG...
For a travel and adventure shooter needs to work fast, and usually gets only one chance to make a shot, the two biggest reasons to shoot RAW are:

1. Adjustable White Balance
Loosely speaking, white balance is the color temperature of the scene.  In tungsten lighting, it is warm, and JPEG shooters walking indoors will have to change the White Balance setting on their cameras from Daylight to Tungsten, in order to avoid overly orange looking images.  If you forget to change the white balance when walking back outside, you'll end up with bluish images.  The JPEG White Balance AUTO setting usually does a fine job in DAYLIGHT, but struggles in unusual lighting, like tungsten or underwater.  With RAW, I simply leave it in AUTO, and adjust it back home on my computer if required, when I have plenty of time, and no pressure.

2. Greater Dynamic Range
Correctly speaking, this should read greater exposure latitude.  What I'm getting at is that with post-processing in RAW, you can recover a greater range of tonal details, from dark shadows and washed out skies.  Even with a properly exposed shot, a JPEG shooter, who has less exposure latitude, may end up with washed out skies that he cannot recover.

Climbing Mt. Rinjani, an active volcano in Indonesia.  Highlights in the sky at sunrise are retained in the RAW image.
Those two reasons should be enough for any adventure/travel shooter to switch from JPEG to RAW.  If you're not convinced, here's the kicker:


RAW is SIMPLE
The problem with JPEG is that once you've clicked the shutter, and the image is made, there is very little leeway to change whatever is wrong with it.  This means that you have got to get it right in-camera.  To maximize my chances of getting it 'right' when I shot JPEG, I used to spend quite a bit of time with each new camera adjusting and testing each parameter (Exposure, Saturation, Contrast, Sharpness, etc) in order to optimize it's settings

Shooting RAW, I still need to test out the camera, but now I usually only test for Exposure.

It's in the Software
The key to keeping it simple is in the software.  I use Adobe Lightroom 3.  To me, it's like Apple's iPhoto on steroids.  It's an organizer, library, image editor and slideshow creator.  The real strength of Lightroom is in it's Develop (editing) module.  I can't remember the last time I used Photoshop, as Lightroom does enough for me.

Step one to using Lightroom 3 is to get some education, and probably the best reference book is Scott kelby's Adobe Photoshop Lightroom 3 for Digital Photographers.

Goatherd and son, India.  Nikon D300, 50 F/1.4G.  Standard Import Preset settings applied in lightroom.
Step two is to set up an Import Preset, so that when you import your images from your camera, all the settings you want done are automatically done for you.  The trick is to figure out what settings you would like made on ALL your images.  I like bright, punchy images, so I use these settings with my Nikon D300:

Presence:
Clarity 35
Vibrance 35
Saturation 0

Tone Curve:
Medium

Sharpening:
Amount 50
Detail 50
Masking 50

These settings work for the 90% of images that live on my hard drive.  For the 10% of images that I deem worthwhile, I'll also work on the white balance, tones, dust removal (if required), etc.

The beauty about working RAW files in Lightroom is that image editing is non-destructive.  That means that you can play around with these settings while you're learning, and if a few months later, your skills improve and you decide you want to rework those images, they are all there for you.

Next:
Part IV: Advanced Tips

Saturday, October 23, 2010

Adventure Photography Part II: Techniques

In Part I of this series of articles, we looked at what sort of camera to get for participatory adventure photography.  In this segment, we'll look at ten tips and techniques you can do to make sure you come back home with some memorable shots.

1. Research
Do your homework.  Take a look at some travel magazines and scour the internet's photography sites (like Flickr) for ideas and images that others have brought back from those places.
Woman at the Bazaar in Jodhpur, Rajasthan, India.  Nikon D300, 18-200mm lens.
While scouring the internet for ideas on Rajasthan, I came across
Manny Librodo's Rajasthan photos on pbase. I was blown away by his images.  This image is one of many that I shot with inspiration from Manny Librodo.  

2. Shot List
Get a shot list.  Get a small notebook and write down your ideas for the types of shots you would like to make in the form of a list.  You can do it early while doing your research or do it on the plane, but get it done ahead of time.  It's hard to show up at a place and start taking great shots without having some idea of the shots you'd like to make.  For example, on a mountaineering trip, I might jot down something like:
  • Preparation: Close up of map, reading guide book, etc.
  • Packing up: motion blur shot of packing, stuff all over the floor, etc
  • Airport: departure, weighing scale, signboard of airport, etc
  • Vehicle: loading up, dust as jeep pulls away, etc
  • Details: close up of hands, chalking up, racked up gear, altimeter, etc.
  • Portraits: headshots of guide, local at work, local in a bazaar, etc
  • POV:  shoot low - include wildflowers, etc
  • Etc...
3. POV
This means Point of View, or otherwise getting some unusual angles.  Shoot from near the ground to get some wildflowers in the foreground, or stand up on a rock and hold your camera up high and shoot down with an ultrawide.
Mountain Biking in Chiang Mai, Northern Thailand.  This POV shot was made with a DSLR bungeed to my chest and the shutter activated with the self-timer.
4. Be Efficient
Keep your camera handy, take it out on the move and only stop when you're actually taking the shot.  When you do stop, cover a lot of angles, continue to shoot even when you're subject passes you.  For example, I may drop to my knees to shoot my subject as he approaches me, when he gets closer, I may lie prone on the ground to get a low angle shot as he goes by, and then when he passes, I'll continue to shoot, maybe running up behind him to get a POV shot at waist level with a lower shutter speed for some motion blur.  When you're done, stow your camera on the move.
This was shot early one morning during the 250km 'Gobi March' desert ultramarathon race in China.  I ran ahead of my teammates, dropped down on one knee, shot my teammates as they ran past the sign, then hurried to catch up.   Never keep your teammates waiting for a photo!
5. Shoot Early in the Day
Golden hour.  You've heard that the light is best one hour from sunrise (and sunset).  That's one reason to shoot early.  The other reason to shoot early is that you've still got the energy and mental capacity to compose your shots.  Whatever happens during the rest of the day, you'll know that at least you have those early shots in the bag.

6. Know Your Camera
Ideally, you'll have some time to spend with your camera before a big trip.  I like to learn how my camera meters a scene, so I know how it is going to expose for a shot.  I'll leave my meter in Matrix Metering (or evaluative or multi-segment metering), and control exposure with the exposure compensation button.  I've developed a feel for how my camera meters a scene, and I set exposure compensation based on how I feel I want the shot to look.  For example, silhouettes: -2EV; backlit or bright and airy: + 2/3EV.  It's not science, but it's quick and gets me in the ballpark where I can work it a bit more in post-process.  If this confuses you, skip to step 7 ;o)

7. Know Your Limits
I shoot most of the time in Aperture Priority Mode, and occasionally in Shutter Priority.  But when I'm occupied with other aspects of the expedition or race, I set my camera to 'P' Program Mode and keep on shooting.  When I get really tired, confused and start making mistakes, I put the camera away.
Knowing my limits.  I wasn't sure if I would have the strength to carry my DLSR all the way up 6168m Mt. Chola in China, so I left it lower on the mountain and carried a lighter compact camera to the summit.
8. Preset Your Camera Modes
When I really need to work fast, as when I'm racing, I'll preset the camera modes so that when I make a mode selection, I'll be ready for those variables that I've set.  For example, in a bike race, I'll set up Aperture Priority Mode on the lens's largest aperture, so if I switch it to Aperture Priority, I'll know that I've got the largest aperture, which not only gives me the fastest shutter speed, but also shallower depth of field.  If I switch it to Shutter Priority, I've got it set it at 1/30, and I'm ready for a motion blurring or panning shot.  Otherwise, I'll just leave it in 'P' Mode.

9. Bring a Camera
I know this sounds obvious, but sometimes I'll leave my camera behind if I think an adventure will be too hazardous, or I think I won't be able to take any photos.  These days, there are plenty of rugged, waterproof cameras or housings that will allow you to take your camera just about anywhere, and mounts that will allow you to shoot hands free video from a helmet, chest or bike handlebars.
A rugged, waterproof housing will allow you to take your camera just about anywhere.

10. Shoot RAW
This point alone is worth a whole post.  So I'll end with this and hope to see you back for the next installment:


Hazy Days are Here Again

Me with the Totobobo Mask on the trail. Photo © Laura Liong
The haze is back.  A few days ago, the PSI (Pollutant Standards Index) went over 100, or into the unhealthy range.  Outdoor activities were cancelled and people were advised to remain indoors and refrain from strenuous activities.  

Ehh?  A little dust in the air is not going to stop me from getting my biking fix.  And judging from the number of riders on the trail this morning, many others feel the same.  But it's worth reminding ourselves that a little protection goes a long way.


This morning the PSI Reading was in the 70s (moderate range).  I rode on the jungle trails of Singapore where the thick jungle canopy should have filtered out the worst of the pollution.  Nevertheless, I wore my Totobobo Anti-Pollution Facemask and rode for 2 hours between 10am to 12 noon.  Here's a photo of the filters after the ride (used filters on top, bottom are brand new filters for comparison):
Top: Filters after 2 hour ride.  Bottom: Brand New Filters for Comparison
There isn't much of a difference, but it is noticeable.  Keep in mind that I wasn't out in the open, and I only wore the Totobobo for 2 hours in moderate haze conditions (PSI 70s).

I travel everywhere with my Totobobo now, and if you're wondering how black the filters can get, check out this image of a set of filters I wore in China for 4 days riding in a bus:
Totobobo N94 filters after 4 days sitting in a bus in rural China
I'm not going to blow smoke up your ass and tell you that the Totobobo is comfortable and fun to bike with.  You do notice it when it's there: there is increased breathing resistance, and condensation collects inside the mask (Totobobo does make a 'Supercool' design which is supposed to help with this, but it only covers the mouth).  Also, the straps do take a bit of experience to work with.  But I feel the protection is worth it.

There's a few different types of Totobobo Facemasks and filters.  I like the 'Classic', which fits over the bike helmet and doesn't interfere with your eyewear.  I use them with the N94 filters which not only filter out pollution, but also viruses like the H1N1.

If you buy your mask from the Totobobo website, enter "adventurenomad" into the discount code and you'll get 5% off the standard price.  I get 5% from the sale too, but I think this is still the best price you'll find on the Totobobo mask.

Thursday, October 21, 2010

Adventure Photography Part I: The Camera

Before buying a camera, perhaps it's best to examine your role in the adventure you're participating in.  Are you there as a functioning expedition member, or perhaps a racer in a competition; or are you there primarily just to photograph?  If you are there just as a photographer, then the full spectrum of photographic equipment opens up to you, as you won't be encumbered by weight and other considerations.  For an expedition member or racer, photography is likely to play a secondary role, after considerations of achieving the goals of the expedition or race, safety, speed and efficiency.  This is the type of photography we'll be looking at.

Trekking in Nepal with a Nikon D300, 18-200mm lens

First off, what adventure are you participating in?  Hiking, mountaineering and adventure travel lend themselves well to still photography.  The action is slower, and you generally have both hands free to play around with a camera and have some time to compose the shot.  Biking, skiing and kayaking lend themselves better to video photography.  Not only are your hands busy doing something else, but the action is faster in these sports and capturing the movement is a big part of showcasing the activity.  Sometimes, a combination of the still and video photography works well, and these days, many cameras do both.  Here are my picks:

DSLRs
My top picks for a DSLR would be the Nikon D7000 (or D3100 if you want to go lighter or cheaper).  There are a number of other DSLRs that would do the job too, like the Canon 7D or 550D.  It's just that I'm more familiar with the Nikon brand.  I wouldn't get too hung up on the brand of camera.  If you like the way it feels, looks and handles, it will work.
Last Light at Manvar.  Taken with a Nikon D300, 18-200mm lens

I would pair the body with an 18-200mm lens first and then perhaps a 12-24mm (or 10-24mm) lens.  Sometimes, I'll add a 50mm F/1.4 for shallow depth of field shots.  I'm always on the the search for better quality, but time and again, I come back to the 18-200mm as the basic lens for adventure shooting.  Why?  When you're tired, you don't have to move around a lot to get a shot; or sometimes you just can't, as when you are roped-in.  The 18-200mm gives you a wide focal length range without having to think about changing lenses, or cleaning a bunch of lenses, or carrying a bunch of lenses.


Compacts
Sometimes, the weight of a DSLR is too much.  Then, I'd take a compact.  My current choice for a compact would be the Panasonic LX5.  I haven't used the LX5, but my wife and I own two LX3s which we are very happy with.  The compact rides very well slung over the neck, either in front of me, or to the side.  It's light enough that I can bike or climb with it without feeling the weight.
Mountaineering with the Panasonic LX3 Compact Camera
The Micro 4/3 cameras like the Panasonic GF1 are an interesting option that I've also looked into.  For the time being, I've ruled them out because of cost.  If I need light, I'll go with a compact, and if I can afford the weight, I'll go with a DSLR.

Video Cam
I've limited experience with video, but I'd like to do more.  Apple's iMovie make combining still slideshows and video a breeze, and it's easy to upload onto a video sharing site for friends and family to see.
GoPro HD Hero mounted on my mountain bike

My choice for an adventure video cam is the GoPro HD Hero.  It's ultrawide angle and shoots 2 hours of HD video on one 16G SD card, and the battery lasts 2 1/2 hours.  It's light, rugged and waterproof down to 180'(60m).  There's a bunch of mounts available, depending on what sort of adventure you're into.  For example, other than the usual helmet mount, there's a chest mount that is useful for bikers and skiers, a suction cup mount for kayakers and surfers, and handlebar and rollbar mounts for motorsports or bikers.

Here's a slideshow/video presentation I made with the GoPro HD Heroof a recent mountain bike race:


Next up: Part II, Techniques

Wednesday, October 20, 2010

Cape to Cape MTB 2010


Cape to Cape MTB Race 2010 from Kenneth Koh on Vimeo.

The Cape to Cape Mountain Bike Race is an annual event held in the Margaret River region of Western Australia. 
Map of the Cape to Cape MTB Race from Cape Leeuwin to Dunsborough
It is a four stage race and totals about 200km of distance across a variety of terrain.  The first stage climbs out of Cape Leewin, and then finds its way onto the beach and ends in Hamelin Bay.  Stage 2 winds through back roads, paved roads and some singletrack trail to finsh at Prevelly.  Stage 3 is a 'special' stage with a greater proportion of singletrack through some very nice pine forests.  It ends at the Colonial Brewery in Margaret River.  The final stage is fast paced ride through fire roads and ends with a little singletrack through Meelup Park at Dunsborough.
Stage Three: Singletrack Action
Riders are expected to find their own accommodation and food.  This could be a problem for foreign riders.  We chose to camp out at the suggested campsites.  The race does have some vendors coming to the campsites, but it's not a sure thing.  For example, the food vendor ran out of breakfast food on the morning of the first day (he didn't cater enough, but fixed his mistake and never ran out again), and the coffee vendor decided she could make more money at another event on the 3rd morning, and so we started the day without our morning expressos :o( 
Stage Three ends at the Colonial Brewery
Overall, it is a great event, but is not without its flaws.  The organization is a bit 'loose', but with some Aussie ingenuity and flexible, the job gets done.  For example, there wasn't enough space on the bus to take participants from the campsite to the start line on the first day.  We waited for almost 2 hours for the bus to make a return trip and arrived just 15 minutes before the start.  Even then, there wasn't enough space for the all the competitors and some had drive down, while others hitched a ride.  There wasn't enough time for lunch, but event volunteers managed to scrounge us up some food.
Awards presentation after the race, Dunsborough
Despite the lapses, the event is well worth doing.  The region, the trails and the work that the volunteers have done really make up for the few management lapses, and the event is well worth doing - especially if you can spend some time checking out the Margaret River region after the race.

We used two Panasonic LX3s for the photos and a GoPro HD Wide for the video.  If you would like to see more photos, please see my Cape to Cape set on Flickr.

Monday, October 4, 2010

Everest: Nutritional Supplements

I wrote this article because there is so little information in the way of high-altitude mountaineering and nutritional supplements.  I did some research and I hope others will find this information useful.  Here's what I'll be fortifying my diet with when I take on the world's highest mountain next Spring. 

Nutritional supplements have become a way of life in our modern world.  At this time, the argument isn't so much WHETHER you should supplement, but WHAT you should supplement your diet with.

Climbing Mt. Everest has it's own challenges nutritionally.  I'll be on the Everest expedition for about 2 months next Spring, and training hard for about 6 months til then, and I've determined that to keep myself healthy, I've got to supplement my diet with some nutrients.

I repack my supplements into small one-a-day ziplock bags, and take 1/2 in the morning with breakfast and the rest with dinner.  Here's what's in them:

Morning* 
1 AOR Ortho Core Multivitamin
1 Controlled Labs Orange Triad Multi
1 Now Vitamin C 1000mg, Buffered, Time Released, with Bioflavanoids
1 AOR Mito Charger
1 Beverly International Ultra 40 Liver Tablet

Evening*
1 AOR Ortho Core Multivitamin
1 Controlled Labs Orange Triad Multi
1 Now Vitamin C 1000mg, Buffered, Time Released, with Bioflavanoids
1 AOR Ortho Bone Calcium Supplement
1 Controlled Labs Oximega Fish Oil Capsule

* Amazon links are provided for your information.  I have not checked out the prices.  Personally, I buy my stuff from bodybuilding.com and iHerb.com (use referral code KOH756 and get $5 off your order from iHerb.com) or TSW.com.sg.
In addition, there are certain 'high altitude' supplements I take when I climb, and I start taking these about 2 weeks prior to when I start a high altitude climb:

Morning
1 GNC Ginkgo Biloba Plus Siberian Ginseng
2 First Endurance Optygen HP Capsules

Evening
1 GNC Triple Garlic
1 Digestive Enzyme


Why I take what I take:
The AOR Ortho Core and Controlled Labs Orange Triad are both very good multivitamin supplements.  Each has something that the other one doesn't. Orange Triad has joint aids like Glucosamine, Chondroitin, MSM, and Hyaluric Acid; Ortho Core has N-Acetyl Cysteine (NAC), a precursor to Glutathione, which in addition to being a very powerful antioxidant, may also help clear the lungs of excess mucous.  I hedge my bets and take a little of each.  A standard dose is 6 per day, but at my bodyweight of only 63.5kg (140lbs), I figure 4 per day will do*.  

*Update Feb 2011
Ok, this isn't working out for me.  Since changing over to the new multis, I haven't been feeling as vital.  I think I need to switch back to using a multi at full dose, but I might do something else, like NOW Adam.


I take my fish oil supplement in the evening to prevent 'fish' burps in the day, but also because I believe the slower burning fat in the oil helps keep me warm at night.  Multivitamin supplements, together with a Fish Oil supplement, are what I recommend everyone take, regardless of whether you are climbing Mt. Everest or not!

Vitamin C and Calcium are usually never in large enough quantities in a multi.  I've chosen to add 2000mg of vitamin C a day.  Some are going to say it is too much.  It's a personal decision.  I've tried reducing the amount, but each time I do, my old asthma creeps back in.  Through trial and error, I've found out that the minimum I need to keep my asthma (and other allergies) at bay is 2000mg daily.


The Ortho Bone Calcium supplement is very interesting.  Although there is only 100mg of elemental calcium per capsule in this supplement, it comes in the only form of calcium shown to regrow bone (MCHC, or the Hydroxyapatite form which comes from bovine bone tissue).  The other forms (such as citrate, carbonate, etc) have only been shown to slow down bone loss.

The liver tablet is an 'old school' bodybuilding standby.  Among other things, they are known to increase endurance.  I take one a day to help my body build blood (each tablet provides about 2mg of heme iron), as to well as add in a few BCAA amino acids.

AOR Mito Charger is a new player on the market and brings together 3 useful micronutrients for keeping the mitochondria, or the body's energy production systems, healthy: Coenzyme Q10, R+ Alpha Lipoic Acid and Acetyl-L-Carnitine.  Currently, I'm taking these in 3 separate pills.  This one product brings it together for me in one pill, and at less cost. 


Gingko Biloba, Siberian Ginseng (Eleuthero), Garlic and the ingredients in Optygen HP (Rhodiola and Cordyceps) are known to help acclimatize and perform in high altitude.  I only take these supplements just prior to and during a climb, and they are not part of my daily supplement pack.
 
One of the challenges of high altitude climbing is trying to swallow pills, especially if you are nauseous.  I try to limit the number and size of the pills I have to swallow.   And because altitude can also mess around with your ability to digest food, I take a digestive enzyme with dinner, which is usually my largest meal for the day.

Monday, September 20, 2010

Ace Adventure Challenge Photos

Getting Ready.  Nikon D300, 50mm, F/2.0, 1/1000, ISO200
The Ace Adventure Challenge 2010 was held last weekend.  I volunteered to shoot the race and was assigned to cover the start and the area around Checkpoint 6.  So I threw my Nikon D300, a Speedlight, and some lenses into a Dakine Sequence backpack, hopped onto my mountain bike, and followed the racers around for some fun.  Here's a look at an urban adventure racing course:

The Start.  Nikon D300, 16-85mm, F/16, 1/60, ISO200

On The Bike. Nikon D300, 16-85mm, F/5.0, 1/20, ISO200
Checkpoint 6.  Nikon D300, 12-24mm, F/4, 1/250, ISO200
On The Ropes.  Nikon D300, 50mm, F1.4, 1/50, ISO3200
Full Moon Abseil.  Nikon D300, 50mm, F/1.4, 1/20, ISO3200
Thanks for taking a look.  To view these images full-size and check out more images from the race, please visit my Flickr site.