When I saw the first images that came out of my Canon 350D, I was disappointed. Pictures came out of the camera with cool, bluish tones and harsh, blown-out highlights. I had made a fundamental mistake. I had left the camera on Canon’s default ‘parameter 1’ thinking that Canon would know what I wanted. It doesn’t quite work that way. Only you can determine how you like your shots to look. A studio portrait photographer would probably set up his camera very differently from the way I set up mine.
Set up your camera by performing some camera tests, and make adjustments to the various settings to optimize the image straight out of the camera. In the days of film, you would shoot a test roll of your favorite slide film, bracketing exposures in 1/3 stops under a variety of lighting conditions to fine to the exposure meter. Like many outdoor photographers, I preferred the look of a 1/3 stop underexposure to produce richer colors and preserve highlight detail. Tweaking the settings on a DSLR is even more important, because you are, in essence, creating your own digital ‘film’. In addition to fine-tuning the exposure meter, some of the settings you can tweak include contrast, white balance, saturation and the flash exposure compensation.
Ideally, you should test your camera under a variety of lighting conditions. But that’s just too much work for me. Typically for me, the most demanding type of shot is a high contrast scene that includes some sky, and a partially shaded subject in direct sun. Here are some of the settings on my Canon XT 350D, but the principles can be applied to any camera:
Exposure
With the exposure meter set to Evaluative (Matrix, for Nikon users) mode, my 350D tends to open up shadows and wash out the highlights. I generally set the camera for –0.7EV. It gives me more latitude and forgiveness for keeping details in the highlights under high contrast conditions.
Contrast
I set mine at –2. –1 looks all right too, but I wouldn’t set it higher than 0. Canon has settings that it calls “Parameter 1” which boosts the contrast to +1. Big mistake. It’s supposed to give the image more ‘punch’, but at the expense of washed out highlights loss of shadow detail. At lower contrast settings, the camera manages to hold onto some detail that would otherwise have been lost. If the image needs it, I prefer to boost contrast back in post processing.

Saturation
I set mine at +2 for rich, vibrant colors. If you are shooting people, watch out that you don’t overdo the saturation setting. Increasing saturation also has an effect on increased contrast. So watch out that you don’t overdo the contrast setting as well.
White Balance
I leave it in Auto White Balance, because if I set it on something else, like Cloudy, I’m likely to forget and screw up my nighttime shots. However, Auto is a bit too cool for me under most conditions, especially under shade, so I tweak the Auto setting by shifting it Amber +5 (a 25 Mired shift). Under full shade, even this setting is not warm enough for me. I’m still trying stuff out and I might try a +6 Amber shift or play around with shifting the Magenta axis as well. Update 4 Mar: Auto White balance under incandescent lighting is really poor. The technique to use Auto WB will work under most outdoor situations, but indoors, under incandescent lighting, I would change WB from Auto to Incandescent. It's probably best to run some test shots yourself before you offer to shoot your best friend's wedding!
Flash Exposure Compensation
One of my biggest frustrations with Canon is the unpredictable flash performance coupled with the low sync speed of 1/200 sec. To understand more on how the Canon flash works, read this excellent FAQ on EOS Flash Photography. First of all, in P mode with flash, you can’t shift the shutter speed or aperture. The camera decides for you and that’s that. Secondly, in P mode, the camera decides if the flash is going to be used for fill light or as the main light source, and will expose accordingly. For example, if it is bright out, the camera decides that you want fill light, exposes for the ambient light, and automatically reduces the flash output for fill. But if it is dark, the camera decides that the flash is going to be the main lighting, disregards ambient lighting and meters only based on the output of the flash.
 Fortunately, in Aperture and Shutter Priority modes, the camera always exposes for ambient light and the flash is just for fill light. I prefer to set Shutter Priority mode to ensure I don’t exceed the sync speed, as well as to ensure that the meter correctly exposes for ambient lighting, and dial in –1.7EV of flash exposure compensation for fill light in scenics and -1EV for people shots. If I have to use P mode, I set the flash compensation to –1EV and hope for the best.
I set my flash to sync with the rear curtain. Default is for front curtain sync, but that just looks odd to me, particularly at slower sync speeds. I think most people would be better served by setting their flash to rear curtain sync.
I shoot JPEG using Canon’s ‘Creative Modes’ (Av, Tv or P). If you are shooting RAW or using the scene modes, you won’t need any of this stuff except perhaps fine-tuning your exposure meter. Each setting change makes a very small difference to the image. The idea here is that Canon’s settings aren’t engraved in stone, don’t be afraid to experiment, to play around with different settings and to just have fun.
Photos
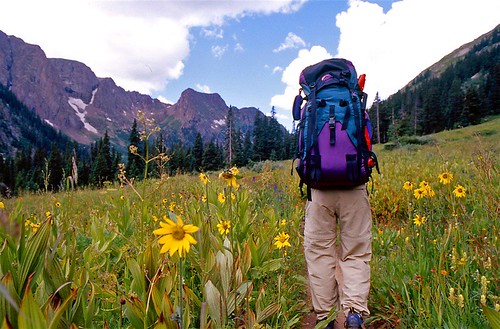
Top: Kodak E100VS at 1/3 stop underexposed for richer colours and preserve the highlights, shot on a Nikon FM2, 24mm.
Middle: Mountain Biker's Voodoo Doll shot with all the settings I described. Shot on Canon 350D, Exposed at -0.7EV, Contrast at -2, Saturation at +2, auto White Balance with +5 Amber trim.
Bottom: Mountain biking shot with camera on body, fill flash set to -1.7 FEC to bring a little detail to my shadowed arms, exposed at -0.7EV, Auto White Balance with +5 Amber trim, Contrast -2, Saturation +2.

No comments:
Post a Comment