
I'm stoked to have my video make Bikepacking Magazine's 12 Best Bikepacking Videos for 2015. I'm honoured, and also humbled, to share this accolade with so many well crafted short films. It's really motivating for me to further my craft. I can't wait to make the next one!
Adventure Nomad

Monday, December 21, 2015
Top 12 Bikepacking Videos of 2015
I'm stoked to have my video make Bikepacking Magazine's 12 Best Bikepacking Videos for 2015. I'm honoured, and also humbled, to share this accolade with so many well crafted short films. It's really motivating for me to further my craft. I can't wait to make the next one!
Saturday, November 7, 2015
Testing The Sony A7S MkII For Adventure Filmmaking
In a previous blog post, I wrote about how the Sony A7S II might be the ultimate adventure filmmaker's camera and about how it might be a replacement for my Panasonic GH4. I went ahead and bought an A7sii from Sony, and a used Zeiss 24-70mm f/4 lens, and that's what I used for the video below.
I took it to the climbing wall, and used it the way I would be using it outdoors, to see if I liked the way it handled. I climbed with it, anchored myself to a bolt and shot the climber below me. I liked how I could turn the camera on with one hand (very Nikonesque), and the grip, although short, was sufficient. The setup, with the Zeiss 24-70, although not light, was well balanced, and the 5-Axis Stabilization worked very well. All in all, it worked out well for me. Check out the test video below:
Adventure Testing Sony A7SII: A Day At The Climbing Gym from Kenneth Koh on Vimeo.
Password to view: 'nomad'
I shot this video as a quick test to see if the Sony A7s Mkii would work for me as an adventure filmmaking camera. Meaning if I could get used to the handling of the camera, and if if I could get it to work with the way I shoot, and get the results I wanted. I wanted some creative control, but not be overburdened, and so I chose to control only the aperture, and left White Balance, Shutter Speed, ISO and (mostly) Autofocus in Auto. Everything was recorded at 4k resolution, 24fps, and the aperture was left wide open at f/4. I used the Autumn Leaves Creative Style in camera with the saturation and sharpening turned all the way down, the Dynamic Range Optimizer set to 4, and white balance set to Auto. The light in the gym was a mix of sunlight filtered through the skylight, and florescent light. All shots were hand-held (except for the title clip where I used a slider), with a little stabilisation (Coremelt Lock and Load) applied in post on about half the clips. Editing was done on FCPX, with some color balancing, contrast, grain and a vignette added in some shots. Voice over was recorded on location, using a Audio Technica ATR3350 lavalier mic plugged directly into the camera. The whole thing was shot in about 2 hours, and the edit took about a day.
Here's what I liked about the A7sii:
- What I found most useful was the 5-axis stabilisation on the camera. I had that on the Olympus OMD EM5, and missed that feature sorely when I sold the camera to buy the GH4.
- Video Autofocus - It can be a bit slow for faster moving subjects, but it's surprisingly useable.
- ISO freedom. It was a bit dark in the subway station, but ISO wasn't even a concern.
- Internal 4k, but I already had that with my GH4.
Here's what I didn't like:
- Ergonomics and the Menu System could be better... but then you already knew that ;)
- Mine's a PAL model, and I need to set it to NTSC to shoot 24p and 120p. Every time I turn on the camera, I get a warning that the camera is in NTSC mode. There is no way to disable or turn off this warning. Seriously? Every time? Don't you think once would be enough?
- No way to set up a custom button to shoot in APSC Crop Mode. I've set up one of the Memory Recall settings on the Mode Dial to shoot 120fps, which also puts me in APSC Crop mode, but that activates Program Mode and I have no control over aperture or shutter speed.
I've only had the camera for a week, so I've got a lot more learning to do. I want to play around with some of the other color profiles, and I need to buy and test out the Time Lapse App. One other big unknown for me is how the small Sony batteries perform in extreme cold.
Will I be replacing the GH4 with the A7sii? I think so, although it was closer than I thought. I really liked the 5-Axis Stabilization, which comes in very useful for a one-man, run and gun type shooting. Video Autofocus has difficulty with subjects moving too quickly to and away from the camera, but is otherwise very useful. The image quality is very nice, both at 4k and in the APSC Crop at 120fps, with an organic feel and nice subject separation. My main issue is with the weight. In order to keep the weight reasonable, I've chosen to replace my M4/3 standard 3 lens setup with focal lengths that range from a full-frame equivalent 14-280mm for a single 24-70mm f/4 zoom. In doing so, I'll lose a lot of focal length range, but that's the tradeoff for the features on the Sony I think are worth having.
Wednesday, November 4, 2015
A World to Share: Q&A with Brandon Li
Brandon Li is a former MTV Reality Series Producer/editor where he learned documentary style filmmaking. In 2013, he sold everything he had, and is now literally living his life out of a suitcase, editing projects on a MacBook Pro with the hard drives velcroed to the back, travelling and making award winning short films about the cultures and people he visits.
 |
| Brandon Li. Image courtesy of Brandon Li |
I'm stoked to have had the opportunity to interview Brandon about his life and the art of travel filmmaking. His short films buzz with energy and have won numerous awards. Check out what Brandon has to say and see some of his work in the blog post below.
Gateway to the Ganges from Brandon Li on Vimeo.
On the Nomadic Lifestyle, Travel and Inspiration
“I draw most of my artistic inspiration from that feeling of being in a new place. When everything is new to me, it's easy to feel inspired to shoot. It's constantly exciting and interesting, but at the same time I frequently feel uprooted or disoriented by the constant moving. I've had a lot of days where I would wake up wondering what country I was in.”
“I really don't have much other than my camera gear and about 5 days of clothes. If it doesn't fit in a suitcase and a backpack, I can't own it. Language barriers are a constant issue. I get lost a lot. I frequently have little doubts, like when I'm lost wandering the streets of a new country with all my bags… and it starts raining!”
“It is difficult to stay grounded, but what makes it worthwhile is getting to immerse myself in other cultures instead of just passing through like a tourist.”
Tokyo Roar from Brandon Li on Vimeo.
The Method, Process and Technique
“I consider the commercial work and the personal work to be practice fields for each other. I learn things doing my commercial projects that I want to apply on independent films, and then I figure out techniques on those films that I can bring back to the paid gigs. I always want to push my abilities a bit further with each film.”
“For my personal projects, I improvise based on the people and landscapes I encounter while wandering around. I look for things that can't be planned; this is what I feel gives a film energy. For instance, filming a mountain at sunrise is much more interesting to me if there are children playing a pickup game of football in the foreground.”
“My reality TV experience taught me how to spontaneously shoot scenes that feel complete. Basically I shoot "coverage" - wide, medium, close. I try to encourage people to ignore the camera, another skill from reality TV. It's a game of getting close without being intrusive, and it just takes practice (and lots of mistakes).”
“In editing, I put together this coverage like one would do with a scripted film, re-arranging shots to make the scene flow naturally. Once I have a few key scenes edited, I'll figure out the bigger storyline of the whole video. That's the main challenge. The most difficult part of editing is getting the pacing right so that the film seems to follow a natural trajectory and ends satisfyingly. This just takes many, many revisions.”
“I consider shooting to be kind of a sport, so I make sure I get out there and shoot as often as possible and improvise new techniques. I think techniques are as important as gear. Most of my camera moves are done just by moving my body in the right way, and most of my edits are simple cuts with no fancy effects or plugins. If you're not getting the shots you want, try changing your technique before acquiring more gear.”
 |
Brandon shooting in Guam (Chamorrofilm.com). Photo by Jessica Peterson
|
Tools of the Trade
“I like shooting with any camera that can deliver the image and still fit in a backpack. That's my main requirement - I have to be able to travel easily with it.”
“GH2 was great for a while, but then the A7s came along with a myriad of superior features, such as low light performance, zebra stripes, peaking, slow motion, etc. Plus, the A7s is actually a pretty tiny camera provided you aren't using the larger, heavier lenses for the system. It's lighter than the Gh2 body.”
“I've just recently bought a Sony A7rii, which I used on my last personal project along with the Sony RX10ii and a few GoPros. I like shooting 4k, even if I will be outputting a 1080p final film, because it allows me to crop and re-frame my shots in post.”
"If I had to choose 3 lenses to travel with, they would be the Sony 24-240mm, Nikon AIS 50mm f/1.4, Sony 10-18mm. First requirement is covering the "normal" focal lengths. As a travel filmmaker, I rely on my zoom lens quite a bit to frame distant subjects. It's not a fast lens (f/3.5-6.3) but the Sony cameras have good low light performance so I can still use it for most circumstances. Second requirement is having shallow depth-of-field ability, which the 50mm takes care of. That Nikon lens focuses quite close, so I can use it for macro-type shots as well as normal portrait stuff. Also, because it's adapted, I can remove it from the adapter to do lens whacking (special defocus effects). If I had to lose one perspective it would be the ultra-wide one. I can almost always re-frame my shot, or just step back, to get that wide perspective."
Where to Next and Chilling Out
“I usually pick my locations to be near my potential future projects. It's kind of a tricky game planning where to be - I don't want to fly off to a remote corner of the globe and then book a shoot in London, for instance. I just use my best intuition.”
“I've been to Tokyo twice this year because it's just awesome. I love re-visiting places and catching up with friends.”
“When I chill out, I'm the laziest person on earth. Earlier this year I rented a beach shack in Goa, India and spent a week just watching the sun set every day.” "Maybe I should learn to play racquetball or something?”
Brandon's portfolio site unscripted.com showcases his personal and commercial works, and his tech blog RunGunShoot.com describes shooting techniques using minimal equipment.
Monday, September 21, 2015
Sony A7s II: Is This The Ultimate Adventure Filmmaker's Camera?
A travel and adventure camera should be lightweight, rugged, and simple to use while offering good image quality. Last week, Sony announced the Mark II version of it's legendary low light camera, the A7s II. Here are my thoughts as to why I'm considering this as a replacement for my Panasonic GH4 in 2016, and maybe why you should be considering this camera too.
When I got my Panasonic GH4 in 2014, I considered 3 cameras, each with its own special 'party trick': The first generation Sony A7s with it's legendary low light sensor; the Olympus OM-D E-M1 with 5-Axis Image Stabilization, and the Panasonic GH4 with internal 4k recording. The Sony A7s Mark II combines all these 'party tricks' into one camera.
5-Axis Image Stabilization
I would put this feature at the top of the list. It's the only feature I miss, moving from my Olympus OMD EM5 to the Panasonic GH4. While it's useful for still photographers, it's simply incredible for videographers. It's almost like having a gimbal/steadicam built into the camera. Technologically, it's quite a feat that Sony has been able to stabilize a sensor 4 times the size of the M4/3 sensor like the OMD EM1.
With a little stabilization with software in post-production, this would look very solid
Low Light Sensor
Low light shooting on the A7s is a different league and opens up new shooting possibilities (I'm thinking pre-dawn alpine starts). The A7s sensor also has more dynamic range than the GH4, and the new A7sII should be the same or even better. Higher dynamic range will allow more flexibility in post processing, both for still images in for video. The A7sII has a full frame sensor, which will give me more options with depth of field.
Check out the low light capability of the A7sii in this video from Sony
Internal 4k Recording
While the original A7s had the ability to shoot in 4k, it could not record this internally. The new A7sII adds internal recording capability, which keeps the 4k setup compact, lightweight and simple. This was the one killer feature the GH4 had over the original A7s.
Other A7sII Benefits over the GH4
USB Charging
One advantage the A7sII has over my GH4 is that the batteries can be recharged in camera by USB from an external battery, saving the need to carry a charger and cable. It also makes it easier to possible to recharge in the field using a simple external battery like the Anker that I usually carry to recharge my iPhone and Gopro. The A7sII battery doesn't last as long as the GH4, but they are also about half the size and weight, so I think that's a wash.
Useable Continuous Autofocus in Video Mode?
Technically, the GH4 can rack focus by touching the screen. Practically, I have not been very successful with this and tend to use manual focus. Continuous AF in the A7sII video mode looks very useable in the following video clip.
No details on how the AF works for video, but this looks very useable
Downsides
A7s II, which has a Full Frame sensor, comes with some downsides when compared to a Micro Four Thirds camera like the GH4.
The A7s body and lenses, while lighter than comparable full frame equivalents from Nikon and Canon, are significantly heavier than the Panasonic GH4 kit that I'm presently using. The A7sII body weighs 584g. 480g for the GH4. To replace the Panasonic 7-14mm f/4 Lens (300g) I'm currently using, I'll need the Sony 16-35mm F/4 Lens
 (518g). Some increase in weight is to be expected, stepping up from M4/3 to Full Frame. Sitting here at my desk, it's hard to imagine what an increase in load will feel like on my shoulders and back 3 days into a multi-day adventure, but I can tell you I won't like it. As a side note, the A7sII battery doesn't last as long as the GH4, but they are also about half the size and weight, so I think that's a wash, weight wise.
Cost
You get what you pay for. If you are coming from a Full Frame camera, the A7s II may be reasonable, or even cheap. Coming from a Micro Four Thirds camera, I find the camera and lenses expensive. Again, you get what you pay for, as it's a step up from M4/3 to Full Frame, just something you should factor into your considerations.
Final Thoughts
The Panasonic GH4 is the best handling camera I've ever used. It is a great balance between image quality for its size and weight. I've used it in wet/humid, dry/dusty conditions, and it has not failed me yet. But it's not particularly great in low light, nor does it have 5-Axis Image Stabilisation. Ultimately, my decision to switch will rest on what Panasonic comes out with the GH5.
 |
| Sony A7s II |
- 5-Axis Image Stabilization
- Low Light Sensor
- Internal 4k Recording
5-Axis Image Stabilization
I would put this feature at the top of the list. It's the only feature I miss, moving from my Olympus OMD EM5 to the Panasonic GH4. While it's useful for still photographers, it's simply incredible for videographers. It's almost like having a gimbal/steadicam built into the camera. Technologically, it's quite a feat that Sony has been able to stabilize a sensor 4 times the size of the M4/3 sensor like the OMD EM1.
With a little stabilization with software in post-production, this would look very solid
Low Light Sensor
Low light shooting on the A7s is a different league and opens up new shooting possibilities (I'm thinking pre-dawn alpine starts). The A7s sensor also has more dynamic range than the GH4, and the new A7sII should be the same or even better. Higher dynamic range will allow more flexibility in post processing, both for still images in for video. The A7sII has a full frame sensor, which will give me more options with depth of field.
Check out the low light capability of the A7sii in this video from Sony
Internal 4k Recording
While the original A7s had the ability to shoot in 4k, it could not record this internally. The new A7sII adds internal recording capability, which keeps the 4k setup compact, lightweight and simple. This was the one killer feature the GH4 had over the original A7s.
Other A7sII Benefits over the GH4
USB Charging
One advantage the A7sII has over my GH4 is that the batteries can be recharged in camera by USB from an external battery, saving the need to carry a charger and cable. It also makes it easier to possible to recharge in the field using a simple external battery like the Anker that I usually carry to recharge my iPhone and Gopro. The A7sII battery doesn't last as long as the GH4, but they are also about half the size and weight, so I think that's a wash.
'Always On' Depth of Field Preview
One of the least used buttons on cameras is the Depth-Of-Field Preview button. Cameras normally keep the lens apertures stopped wide open to allow the maximum amount of light in for a bright viewfinder and make it easier to manual focus. When you press the Depth of Field Preview button, the lens is stopped down to the selected aperture, the image gets darker, and shows you what is acceptably sharp or blurred. The A7s II can be selected to have the Depth of Field Preview 'always on', which means as you change the aperture, you can view the resulting depth of field changes 'live' on the LCD or EVF.
Ability to Transfer RAW Images Wirelessly to iPhone
I shoot RAW still images. It's nice to be able to grab a RAW shot off your camera, then send it wirelessly to your smartphone where you can do some basic editing, then upload it to social media. The A7sII can do this with RAW files by converting them on the fly to JPEG images, which it then sends to your IOS or Android device. If I wanted to do this on my GH4, I would need to shoot 2 copies on the camera, use the JPEG files to transfer to my iPhone, then come back home and delete all the JPEG files that I didn't need in the first place.
Useable Continuous Autofocus in Video Mode?
Technically, the GH4 can rack focus by touching the screen. Practically, I have not been very successful with this and tend to use manual focus. Continuous AF in the A7sII video mode looks very useable in the following video clip.
No details on how the AF works for video, but this looks very useable
Downsides
- Weight
- Cost
The A7s body and lenses, while lighter than comparable full frame equivalents from Nikon and Canon, are significantly heavier than the Panasonic GH4 kit that I'm presently using. The A7sII body weighs 584g. 480g for the GH4. To replace the Panasonic 7-14mm f/4 Lens
Cost
You get what you pay for. If you are coming from a Full Frame camera, the A7s II may be reasonable, or even cheap. Coming from a Micro Four Thirds camera, I find the camera and lenses expensive. Again, you get what you pay for, as it's a step up from M4/3 to Full Frame, just something you should factor into your considerations.
Final Thoughts
The Panasonic GH4 is the best handling camera I've ever used. It is a great balance between image quality for its size and weight. I've used it in wet/humid, dry/dusty conditions, and it has not failed me yet. But it's not particularly great in low light, nor does it have 5-Axis Image Stabilisation. Ultimately, my decision to switch will rest on what Panasonic comes out with the GH5.
Thursday, September 10, 2015
Tools for Bike Travel
I travel often with my bike, and I can't travel with all my tools when I fly with my bike. To save weight, I bring a minimum of tools, which I keep in a little travel tool box. These are an addition to the typical bike tools that you should always have with you, like a bike multitool, pump and tire levers. These are the tools I may use to assemble my bike at the destination, then they stay behind with my bike box or in the car. Here are some tools you should consider bringing with you when you travel with your bike.
1. Ritchey 6-Bit Bicycle Torque Key
Carbon parts and titanium bolts require some care to fit. Both over and under torquing the bolts could affect the ride, and shorten the life of the parts. I love the Ritchey 6-Bit Bicycle Torque Key as it's compact and lightweight, and really fast to get bolts on and off with the 'spinner'. I use the 5Nm preset mainly for my stem faceplate bolts, but I think it's also a good 'general' use torque, and better than my 'feel'.

2. Topeak D2 SmartGauge
Getting consistent tire and shock pressures is one key to riding better. I use a floor pump at home, but I don't bring that when I travel. This gauge can check tires, front and rear shock pressures. I do bring a travel tire and shock pump, but I can use whatever pump is available to me, and still maintain consistent pressures.
3. Park Tool HR-8 Hex Wrench (8mm)
It's easy enough to get a pedal on with a bike specific multi-tool, but after a long ride, it can be tough getting the pedal off if you cannot apply enough torque. One solution is to throw a long-armed 8mm allen key into the travel kit. I use mine to get the pedals on, and it stays with my bike box until I return to take the pedals off.
4. Leatherman New Wave Multitool
A bike specific multi-tool comes along with me on every ride, but a general purpose one, like the Leatherman Wave pictured above, can be a useful addition to the travel kit. I use a tool like this to cut up and pull out the staples on cardboard bike boxes, slice fruit and duct tape. The little screwdriver can be useful for sunglasses, the file used to deburr sharp edges after a crash, and the pliers useful for taking apart power links. I've heard of the saw being used to cut up some wood to rig up a chain guide for a single speed conversion when the derailleur broke. It's mainly a basecamp/hut/car tool as it's too heavy to take along most rides, but I sometimes carry a smaller/lighter tool on epic rides.
5. Old Inner Tube
If you have an old inner tube that is no longer useable as a spare, throw that in with your travel kit. They can be cut up to use as shields or shims to protect your frame, rubber bands, GPS retainers. I have also seen them used with tent pegs as a splint for a broken frame.
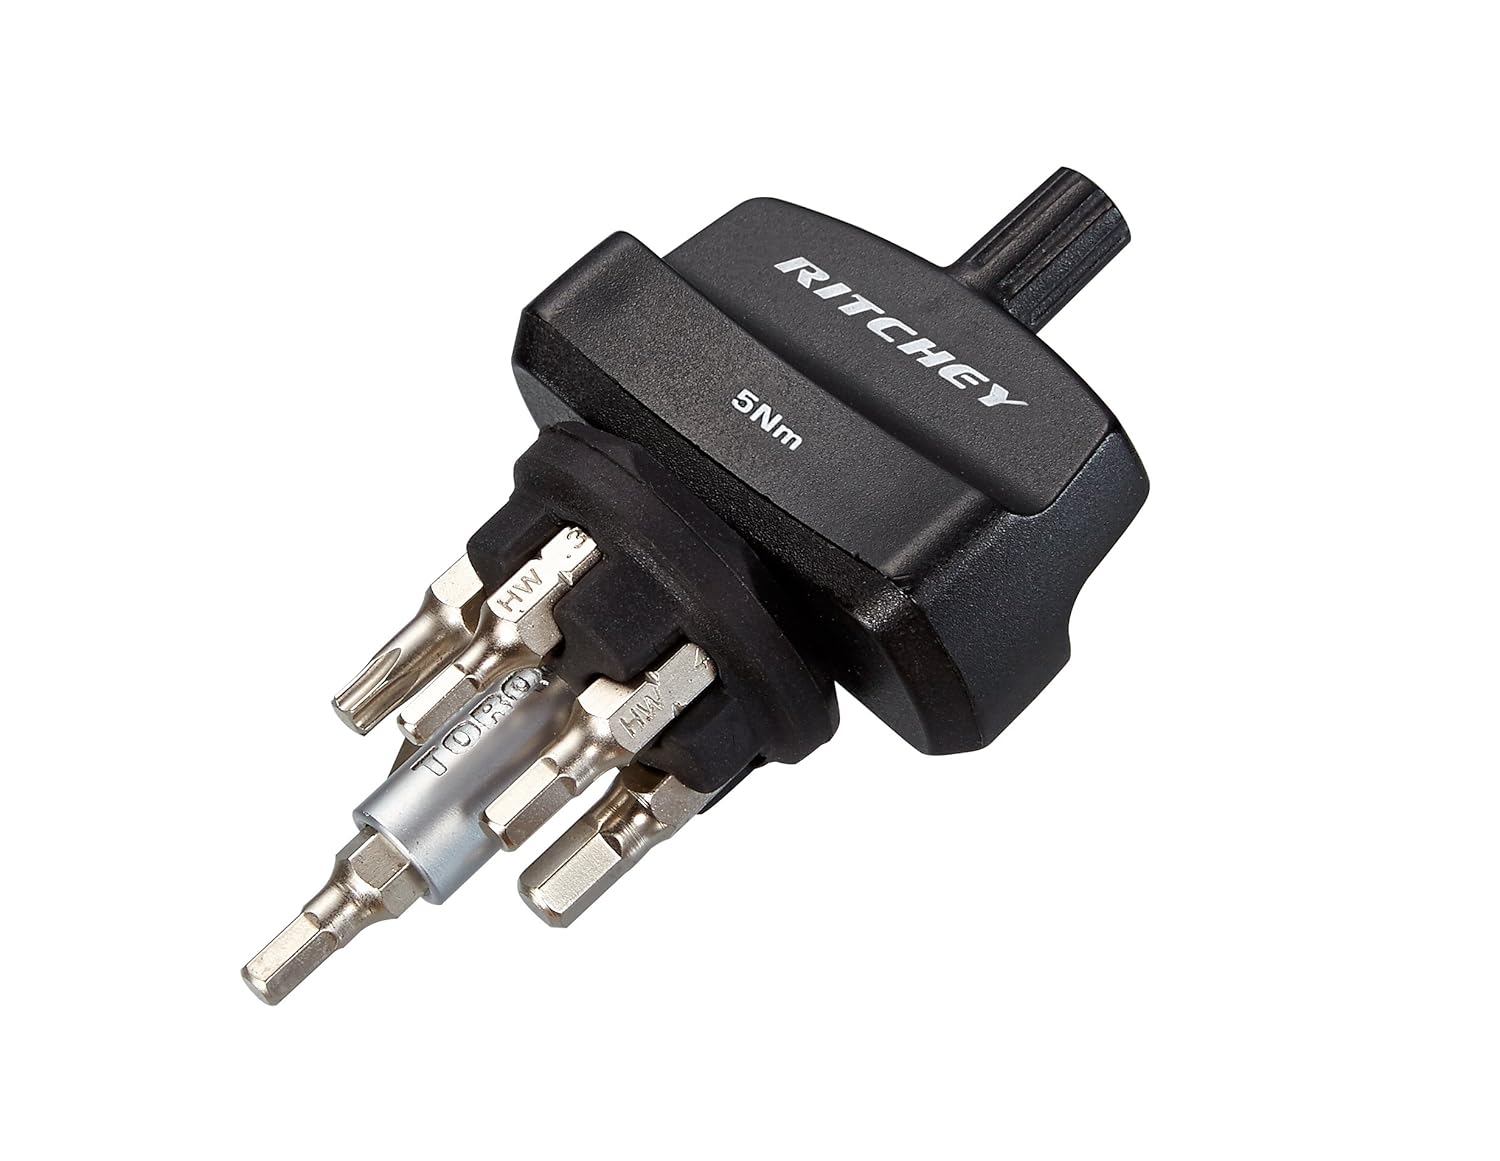 |
| Ritchey 6-Bit Bicycle Torque Key |
Carbon parts and titanium bolts require some care to fit. Both over and under torquing the bolts could affect the ride, and shorten the life of the parts. I love the Ritchey 6-Bit Bicycle Torque Key
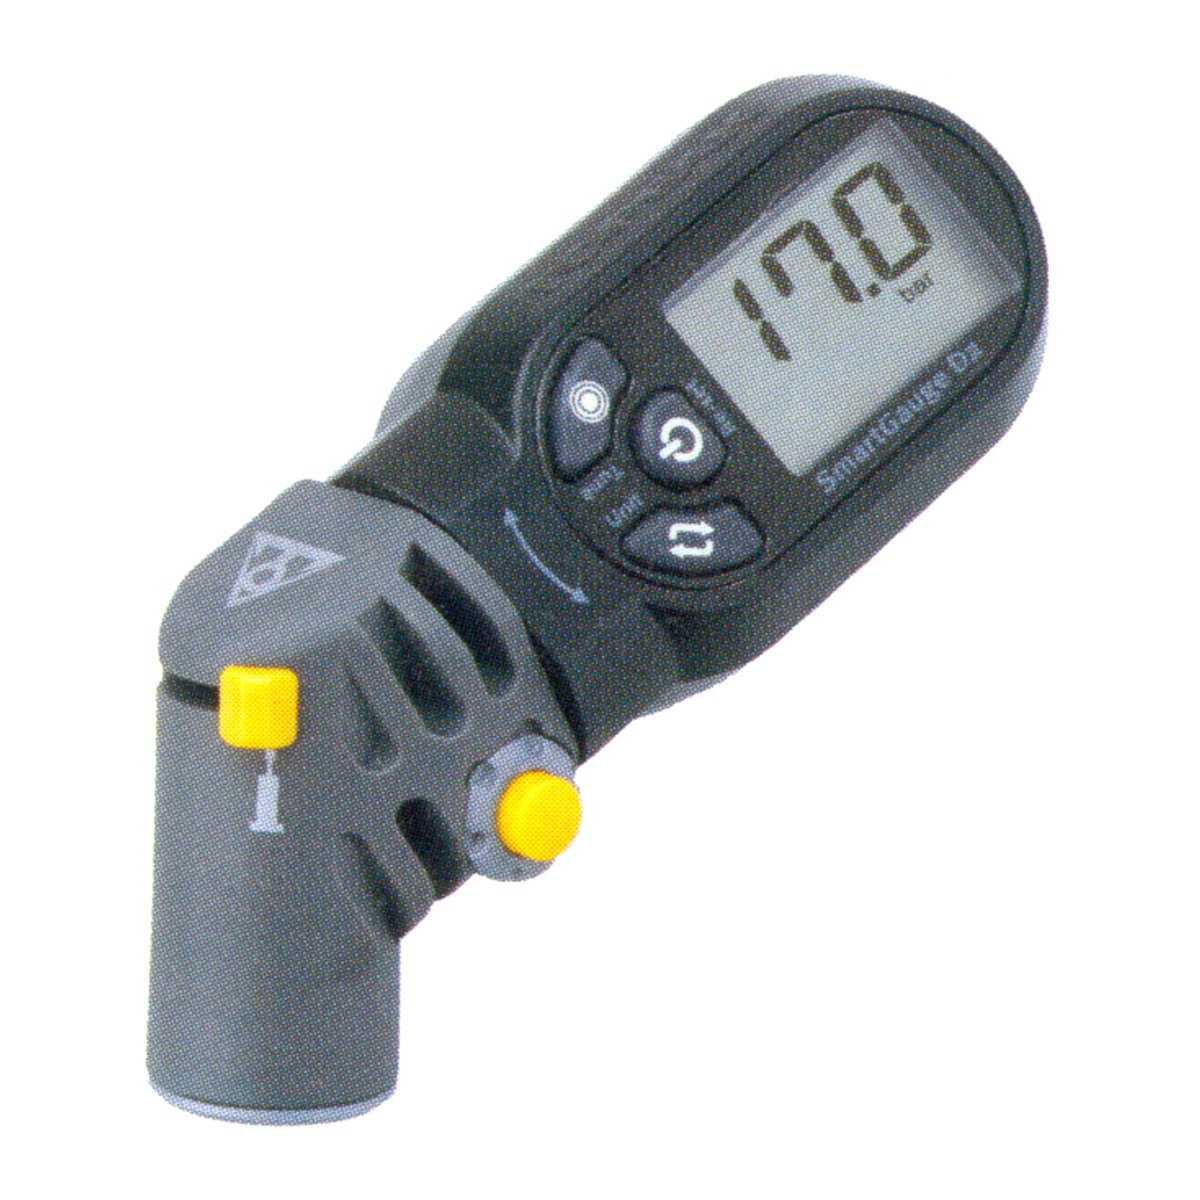
Topeak D2 Smartgauge
2. Topeak D2 SmartGauge
Getting consistent tire and shock pressures is one key to riding better. I use a floor pump at home, but I don't bring that when I travel. This gauge can check tires, front and rear shock pressures. I do bring a travel tire and shock pump, but I can use whatever pump is available to me, and still maintain consistent pressures.
3. Park Tool HR-8 Hex Wrench (8mm)
It's easy enough to get a pedal on with a bike specific multi-tool, but after a long ride, it can be tough getting the pedal off if you cannot apply enough torque. One solution is to throw a long-armed 8mm allen key into the travel kit. I use mine to get the pedals on, and it stays with my bike box until I return to take the pedals off.
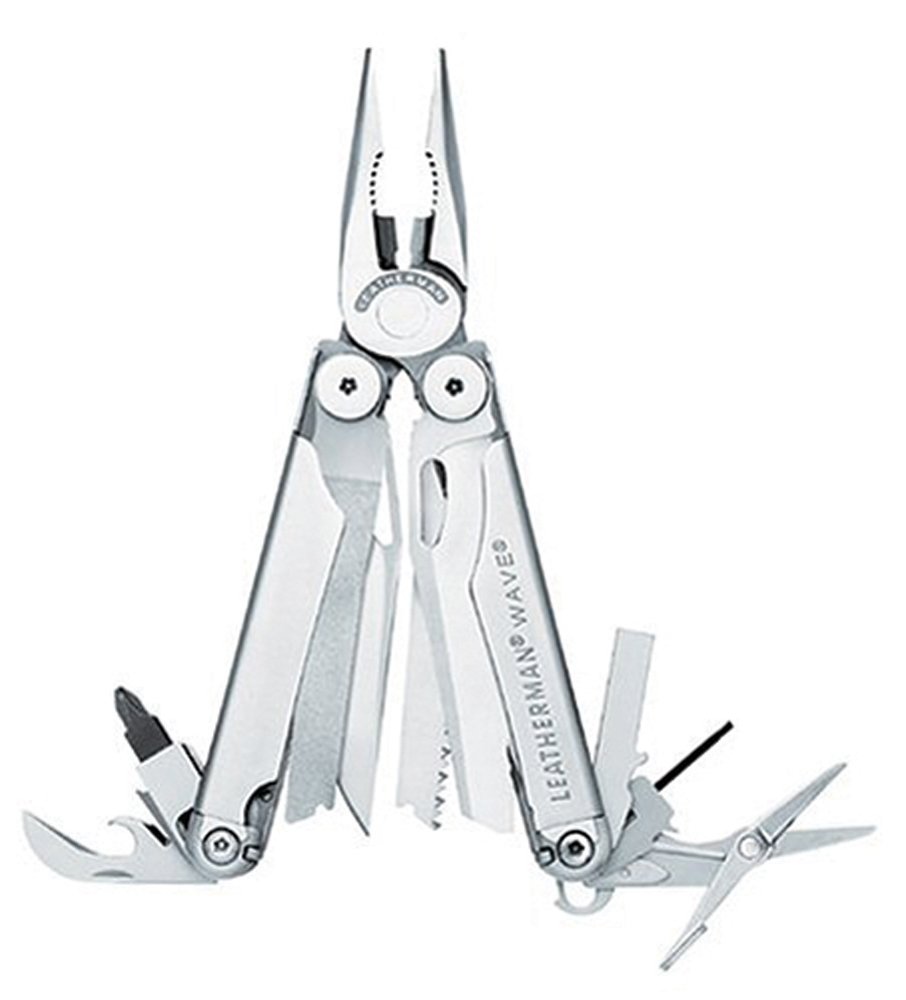 |
| Leatherman New Wave |
4. Leatherman New Wave Multitool
A bike specific multi-tool comes along with me on every ride, but a general purpose one, like the Leatherman Wave pictured above, can be a useful addition to the travel kit. I use a tool like this to cut up and pull out the staples on cardboard bike boxes, slice fruit and duct tape. The little screwdriver can be useful for sunglasses, the file used to deburr sharp edges after a crash, and the pliers useful for taking apart power links. I've heard of the saw being used to cut up some wood to rig up a chain guide for a single speed conversion when the derailleur broke. It's mainly a basecamp/hut/car tool as it's too heavy to take along most rides, but I sometimes carry a smaller/lighter tool on epic rides.
5. Old Inner Tube
If you have an old inner tube that is no longer useable as a spare, throw that in with your travel kit. They can be cut up to use as shields or shims to protect your frame, rubber bands, GPS retainers. I have also seen them used with tent pegs as a splint for a broken frame.
Wednesday, September 2, 2015
Bali Rides Again
Destination: Bali, Indonesia
Activity: Mountain Biking
Season: Mid-June through Mid-September
Operator: Guided, with bali-rides.com
Cost: Low to Moderate
Back again to Bali for some mountain biking. I'd been cooped up for the past few weeks video editing at my computer and needed to kick start my training and get some biking in. A change of scenery is great motivation, so I contacted Ramang Kristian of Bali Rides to see if he could fit me in for a multi-day ride.
Ramang arranged 6 days of riding for me. 3 days on, a day rest, followed by another 3 days of riding. It was a no-hassle trip. Bali Rides arranged everything from the airport pick-up and drop-off, all meals and accommodation. Bali Rides' airconditioned rooms were all full, so I stayed in the non-airconditioned bamboo hut - Simple, rustic and comfortable, although a little noisy in the early morning. One balinese massage was also included in my package.
Each ride was about 42km, and mostly downhill, but had an average of 550m of total climbing. Technical difficulty ranged from the easy, but scenic Ubud loop, to intermediate trails like the Abang to Mengwi trail, easily the best ride in Bali with small techy drops, swooping singletrack, and breathtaking views.
Updated 25 June 2016 with a new video I shot for Bali Rides.
Activity: Mountain Biking
Season: Mid-June through Mid-September
Operator: Guided, with bali-rides.com
Cost: Low to Moderate
Back again to Bali for some mountain biking. I'd been cooped up for the past few weeks video editing at my computer and needed to kick start my training and get some biking in. A change of scenery is great motivation, so I contacted Ramang Kristian of Bali Rides to see if he could fit me in for a multi-day ride.
 |
| Mt. Abang to Telaga Waja River Ride. Photo by Bali Rides/Ramang Kristian |
Ramang arranged 6 days of riding for me. 3 days on, a day rest, followed by another 3 days of riding. It was a no-hassle trip. Bali Rides arranged everything from the airport pick-up and drop-off, all meals and accommodation. Bali Rides' airconditioned rooms were all full, so I stayed in the non-airconditioned bamboo hut - Simple, rustic and comfortable, although a little noisy in the early morning. One balinese massage was also included in my package.
 |
| Bamboo Hut at Bali Rides B&B |
Each ride was about 42km, and mostly downhill, but had an average of 550m of total climbing. Technical difficulty ranged from the easy, but scenic Ubud loop, to intermediate trails like the Abang to Mengwi trail, easily the best ride in Bali with small techy drops, swooping singletrack, and breathtaking views.
 |
| Riding the beginner Ubud Loop trail through rice padi fields and coconut trees. Photo by Bali Rides/Ramang Kristian. |
Costs are low to moderate, depending on where you come from. A day ride will cost IDR1.1 million (USD$78, SGD$110), which includes the guided ride, hotel pickup and dropoff, lunch and snack, and full-suspension bike rental (Specialized carbon Epic 29ers or carbon Stumpjumpers - really good rental bikes!). Multiday rides are all custom arranged. Contact bali-rides.com for a quote.
I just wanted to ride, so I didn't shoot any photos or video this trip. But here's a video from my first trip with Bali Rides. The riding is pretty typical, but we chose to stay at different hotels to get to see more of Bali:
Updated 25 June 2016 with a new video I shot for Bali Rides.
Friday, August 21, 2015
Mountain Biking Telluride to Moab: The Ride
Continued from the last post:
When we got to Moab, we met up with some friends and did a couple of rides. It always seems that we don't spend enough time in Moab, because before we knew it, it was time to depart for Telluride, and begin the trip trip that we had come all this way for: Riding two hundred something miles from Telluride to Moab, using San Juan Hut Systems huts along to way, so that we could ride with light packs and enjoy the riding!
When we got to Moab, we met up with some friends and did a couple of rides. It always seems that we don't spend enough time in Moab, because before we knew it, it was time to depart for Telluride, and begin the trip trip that we had come all this way for: Riding two hundred something miles from Telluride to Moab, using San Juan Hut Systems huts along to way, so that we could ride with light packs and enjoy the riding!
San Juan Hut System is the only destination (ie. Telluride to Moab; Durango to Moab) hut to hut based system in the US. It allows a biker to really get deep into the backcountry by eliminating the need to carry tents, sleeping bags, cookware and food for 7 days of riding.
 |
| Oh, yes! This is one ROWDY Ride! |
If you've ever thought about doing one of these rides, this short video should give you a good idea of what to expect:
Mountain Biking Telluride to Moab from Kenneth Koh on Vimeo.
Having done the similar Durango to Moab ride a few years ago, we kind of knew what to expect. While there's still a fair bit of dirt road and a little paved road, this ride had more singletrack. In fact, so much more singletrack that we simply could not ride all the singletrack options. Lucky for us, they were options, and when weather or our bodies had enough, we could take an easy dirt road ride to the next hut.
I've been to Moab 4 times over the years. Once in the Spring, once in the Fall, and twice in Summer. I definitely want to return, because there's just so much more riding to do, but I won't be going back in Summer. It's too hot and just too crowded.
If you were deciding on which of the two hut to hut rides to pick, I'd say go with the Durango to Moab Ride if you're riding for the scenery and views. If you like more technical riding, pick Telluride to Moab. Either way, you won't be far wrong. One of these rides definitely belong on every mountain biker's bucket list!
Mountain Biking Telluride to Moab: The Drive Up
It's a long way to get to Moab - It's along trans-pacific flight, followed by a long drive from California to Utah. We've found that by following the bodies natural sleep cycle, and by getting a lot of sunshine during the day, the drive up can be a good way to acclimatise as well as take in a lot of the sights.
 |
| Horseshoe Bend, Arizona, enroute to Moab, Utah. |
Arriving into the USA after a big transpacific flight has always been a pain, but arriving into Los Angeles this trip has been my most pain free so far, thanks to the new ESTA immigration clearance, available for selected countries. As usual, our plan was to get out of the airport as quickly as possible, then drive for as long as we could, usually a couple of hours before needing to stop for sleep. Our destination this trip, was Moab, in Utah, where we were heading up to do some mountain biking. We've found that due to time zone changes, we are usually up very early, by 3 or 4am, and so we make use of that time taking the bikes out of their boxes and assembling them. We hit the road about 5am, or just before daybreak, and stop for breakfast along the way. By breaking up the drive, can taking in a lot of sunshine, we adapt faster to the new time zone. We took in as many sights as possible on the drive up by heading out onto Historic Highway Route 66...
Route 66 Enroute to Moab, Utah
The next day, we made it to Panguitch, Arizona, where we got to ride Thunder Mountain Bike Trail, which was an unexpected treat! Great riding, really awesome scenery! After the ride, we took a drive through Bryce Canyon National Park, and took in a short hike.
The highlight of the drive up to Moab was Page, Arizona, which we reached the evening after leaving Bryce Canyon NP. We stayed for 2 nights and visited Antelope Canyon, Waterholes Canyon and Horseshoe Bend.
The evening after we visited Antelope Canyon, we reached Moab. By this time, we were fully acclimatised and ready to ride!
To be continued...
Tuesday, June 30, 2015
How to Use the iPhone 6 (and 6 Plus) for Backcountry Navigation
 |
| The new iPhone 6 and 6+ (pictured) have larger and better displays for map use in the field and significantly better battery life. Changes to Airplane Mode introduced in IOS 8.3 make it easier to manage battery life. We are eaisly getting 6-7 days or more of normal backcountry use without recharging. Photo from adventurealan.com |
This is a great article by AdventureAlan'sUltralightBackpacking, whose thoughts mirror my own on how to use the iPhone for Backcountry Navigation. Click this link to jump to the article.
Thursday, June 4, 2015
3 Basic Nutritional Supplements for Expeditions and Adventure Travel
The first rule of supplementation is - Real food first. This means you should try to get your nutrition from fresh, natural, whole food. Supplementation comes in to fill in potential nutrition gaps, which could happen if you are travelling and not quite sure of what food is available, or on expedition where fresh, whole food may not be available.
I'll tell you what works for me, but I'm not a doctor, or nutrition expert, so please do your own research or seek medical advice before consuming any supplements. Here are 3 basic, but key, nutritional supplements I take, whether at home or traveling to some adventure:
1. Fish Oil
Fish Oil is a common term which refers to Omega-3 Fatty Acids, specifically EPA and DHA.
The body uses fish oil in many ways, including: Development and protection of the brain; cardiovascular protection (also 'thins' the blood by making it more 'slippery'); balances out Omega 3 and 6 ratios (our modern diet contains an unbalanced ratio of too much Omega 6); has anti-inflammatory properties; and helps protect against skin issues (psoriasis) and allergies.
The human body cannot make EPA or DHA, so you have to get it from your diet. The best sources are cold water oily fish, like sardines, salmon and anchovies. A rising problem with consuming these fish is that they may accumulate toxins like mercury dioxins and PCB. If you are far from the sea, grass fed cattle is another source.
Fish oil in supplement form is usually molecularly distilled for purity, then recombined to ensure a consistently potent product. To ensure I get my quota of Omega-3s when I travel, I take a single capsule of Now Foods Ultra Omega-3 daily, which provides me with 500mg of EPA and 250mg of DHA.
2. Probiotics
The human body is full of bacteria, both good and bad. Probiotics are the 'good' or 'helpful' kind.
Researchers are still figuring out the many uses of probiotics. They not only help the digestive system, but it is thought they also enhance immunity by shutting out bad bacteria. They also easy symptoms of Irritable Bowel Syndrome, Crohn's Disease, Eczema and other allergies.
Sources of probiotics include kefir, yogurt, miso, sauerkraut, kimchi and pickles. Beneficial probiotics also exist in the soil which, with modern cleanliness, we no longer consume.
Because they are living foods, I supplement with 'shelf stable' probiotics that require no refrigeration and travel well. I use Garden of Life Primal Defense which is a strong, broad spectrum probiotic supplement, which contains both colonizing and transient soil based probiotics which may be beneficial, but through modern cleanliness, we may no longer consume.
3. Desiccated Liver Tablets
Sometimes called "Nature's Multi-vitamin", the Desicatted Liver Tablets I take are made from pure, grass-fed beef liver that has been de-fatted, and then freeze dried.
Liver is a rich source of heme iron, which is a great blood builder. Exactly what is needed on a trip to high altitude. It is also a rich source of amino acids, minerals, B-vitamins and Cytochrome P-450. It may also extend endurance as demonstrated in the following experiment:
I take 2 Universal Nutrition Uni-Liver Tablets each morning. High on Mt. Everest when my stomach could not function well, it was one of two supplements that I would swallow with my instant noodles (the other was fish oil). I'm not sure if that was enough to get the endurance boost, but it was worth a few grams of protein and enough for the summit.
I order these supplements from iherb.com. For international orders, they are hard to beat for selection, price and shipping. Get $10 off your first order with my discount code KOH756.
Sources: Web MD, Michael Colgan, Robb Wolf, Chris Kresser, Dave Drapper
 |
| Yumm! Liver Tablets, Probiotics and Fish Oil |
1. Fish Oil
Fish Oil is a common term which refers to Omega-3 Fatty Acids, specifically EPA and DHA.
The body uses fish oil in many ways, including: Development and protection of the brain; cardiovascular protection (also 'thins' the blood by making it more 'slippery'); balances out Omega 3 and 6 ratios (our modern diet contains an unbalanced ratio of too much Omega 6); has anti-inflammatory properties; and helps protect against skin issues (psoriasis) and allergies.
The human body cannot make EPA or DHA, so you have to get it from your diet. The best sources are cold water oily fish, like sardines, salmon and anchovies. A rising problem with consuming these fish is that they may accumulate toxins like mercury dioxins and PCB. If you are far from the sea, grass fed cattle is another source.
Fish oil in supplement form is usually molecularly distilled for purity, then recombined to ensure a consistently potent product. To ensure I get my quota of Omega-3s when I travel, I take a single capsule of Now Foods Ultra Omega-3 daily, which provides me with 500mg of EPA and 250mg of DHA.
2. Probiotics
The human body is full of bacteria, both good and bad. Probiotics are the 'good' or 'helpful' kind.
Researchers are still figuring out the many uses of probiotics. They not only help the digestive system, but it is thought they also enhance immunity by shutting out bad bacteria. They also easy symptoms of Irritable Bowel Syndrome, Crohn's Disease, Eczema and other allergies.
Sources of probiotics include kefir, yogurt, miso, sauerkraut, kimchi and pickles. Beneficial probiotics also exist in the soil which, with modern cleanliness, we no longer consume.
Because they are living foods, I supplement with 'shelf stable' probiotics that require no refrigeration and travel well. I use Garden of Life Primal Defense which is a strong, broad spectrum probiotic supplement, which contains both colonizing and transient soil based probiotics which may be beneficial, but through modern cleanliness, we may no longer consume.
3. Desiccated Liver Tablets
Sometimes called "Nature's Multi-vitamin", the Desicatted Liver Tablets I take are made from pure, grass-fed beef liver that has been de-fatted, and then freeze dried.
Liver is a rich source of heme iron, which is a great blood builder. Exactly what is needed on a trip to high altitude. It is also a rich source of amino acids, minerals, B-vitamins and Cytochrome P-450. It may also extend endurance as demonstrated in the following experiment:
Proc Soc Exp Biol Med. 1951 Jul;77(3):488-91
'Dr. B. H. Ershoff took three groups of rats and fed them controlled diets for a twelve week period. Group one ate a basic diet fortified with vitamins and minerals. Group two ate as much as they wanted of the same diet plus B vitamins and brewer's yeast. Group three ate the basic diet but had 10% desiccated liver added to their rations.
Then the doctor placed the rats one by one into a drum of water, out of which they could not climb, it was either swim or drown. The group one rats swam an average of 13.2 minutes. Group two, an average of 13.4 minutes. Group three, however, were still swimming at the end of two hours.'
I take 2 Universal Nutrition Uni-Liver Tablets each morning. High on Mt. Everest when my stomach could not function well, it was one of two supplements that I would swallow with my instant noodles (the other was fish oil). I'm not sure if that was enough to get the endurance boost, but it was worth a few grams of protein and enough for the summit.
I order these supplements from iherb.com. For international orders, they are hard to beat for selection, price and shipping. Get $10 off your first order with my discount code KOH756.
Sources: Web MD, Michael Colgan, Robb Wolf, Chris Kresser, Dave Drapper
Monday, April 27, 2015
Nepal In My Thoughts and Prayers
I've been filled with a kind of helpless frustration watching the aftermath of the earthquake in Nepal. I cant sleep and can't get the situation in Nepal out of my mind. I just learned that a friend has lost his home. I guess what is so disturbing is that for the past 30 years that I've been coming to Nepal, it has remained largely unchanged: The same buildings, temples, narrow streets, etc. Kathmandu and the rest of Nepal have had a timeless feel. While the rest of the world charges on towards the 22nd century, Nepal struggles to keep up with the 21st century.... and that was its appeal. Returning each time to Nepal (well, at least outside of Kathmandu) has always made me feel at peace... grounded... my escape from an all too modern life. The next time I return to Nepal, will it have changed? Sure, ancient buildings will need to be repaired or replaced by modern structures, but its the heart of its people that will persevere, and their resilience which will see them through these difficult times.
If you want to help out, don't pack your bags unless you have a specific skill that is needed there, otherwise you will just be another person to feed and shelter. It's not a bad idea to donate to an organisation like the Red Cross which can distribute funds to where it is needed most. Another way to help out is to not shy away from Nepal when it has recovered. Tourist dollars will be most needed, and the mountains remain a stunning landscape, and unforgiving beauty.
If you want to help out, don't pack your bags unless you have a specific skill that is needed there, otherwise you will just be another person to feed and shelter. It's not a bad idea to donate to an organisation like the Red Cross which can distribute funds to where it is needed most. Another way to help out is to not shy away from Nepal when it has recovered. Tourist dollars will be most needed, and the mountains remain a stunning landscape, and unforgiving beauty.
Monday, March 16, 2015
Specialized Epic vs. Epic WC
This is a discussion on the Specialized S-Works Epic vs. the S-Works Epic World Cup, and maybe help you to decide which one is right for you. I'll be comparing older models and not the current 2015 bikes, but you might find the information still relevant.
My 2012 S-Works Epic is the best bike I have ever ridden (it's the bike that won Olympic gold in 2012), but it was heavily used, and I needed to replace the bike in 2015. In 2014, Specialized split the Epic model into two sub-categories to fit different rider needs: The normal Epic for marathon riding, and the WC (World Cup) for fast XCO type courses. The WC is stiffer, has slightly less suspension travel (95mm vs. 100mm) and is strictly a 1x drivetrain as it does not have a mount to attach a front derailleur.I got a deal on a 2014 Epic WC and went with that. The 2015 Epic WC hasn't changed much from the 2014 model that I ride, but the 2015 regular Epic has some pretty significant changes from the 2012 model that I rode, including a new upside down fork, 2x11 drivetrain and the addition of a dropper seatpost.
The frame for the 2014/15 Epics saw a significant change from the 2012/13 models to intergrate what Specialized called SWAT (Storage water air tools) into the frame. I really like this, especially the ability to hold 2 full sized water bottles, even on a size Small frame. But in order to do this, they had to make some geometry changes. My Specialized bike fit, (courtesy of Specialized Asia Pacific), saw me on a size Small 2014 frame, with a longer stem and offset seatpost, compared to my 2012 Medium frame Epic with a shorter stem and a non-offset seatpost. The weight of my Size M 2012 Epic, with some tweaking was 10.0kg (without pedals). My size S 2014 Epic WC weighs 9.6kg (without SWAT kit, without pedals). Note: My WC is modified with the 2013 S-Works crankset to enable me to fit a 30T (or 28T) chainring.
I like to think of my regular Epic as a bomber jet. It is stable, forgiving, confidence inspiring. It is a bike that wants to go straight when something deflects it off course. At the top of something gnarly, and I find my vision closing in on my front tire, I can trust my regular Epic to get get me out of trouble. Yes, it is slower turning, and slower to accelerate, and if I'm racing on an XCO type course where I'm only riding for about an hour and a half, and every second matters, I would prefer to take my WC over the regular Epic.
The bottom line is that for most of my riding, I prefer the regular Epic. The Specialized Epic for 2015 sees some very exciting changes, and look awesome. Hopefully, I'll get to ride one over the next couple of weeks, and I'll update this post if I have anything to add.
Update Mar 19: I got a chance to ride a 2015 S-Works Epic today. Everything I said about my 2012 remains true with the 2015 version, except the 2015 is even more stable, and stiffer. I don't know what it weighs, but it is surprisingly light, considering it has a dropper post, 2x11drivetrain and RS-1 fork.
My 2012 S-Works Epic is the best bike I have ever ridden (it's the bike that won Olympic gold in 2012), but it was heavily used, and I needed to replace the bike in 2015. In 2014, Specialized split the Epic model into two sub-categories to fit different rider needs: The normal Epic for marathon riding, and the WC (World Cup) for fast XCO type courses. The WC is stiffer, has slightly less suspension travel (95mm vs. 100mm) and is strictly a 1x drivetrain as it does not have a mount to attach a front derailleur.I got a deal on a 2014 Epic WC and went with that. The 2015 Epic WC hasn't changed much from the 2014 model that I ride, but the 2015 regular Epic has some pretty significant changes from the 2012 model that I rode, including a new upside down fork, 2x11 drivetrain and the addition of a dropper seatpost.
 |
| The late Burry Stander signing my 2012 Epic frame |
 |
| Specialized Asia Pacific's VJ Varada dialing in the fit on my 2014 Epic WC |
I crashed my Epic WC the first time I rode it, as a result of an improper suspension setup and an over enthusiastic rider ;) The 5mm difference in suspension travel between the WC and regular Epic doesn't sound like a lot, but you can really feel the difference in drops and rock gardens. It is a much firmer feel, and combined with the quicker steering geometry of the WC, I find myself slower than my old Epic going down drops. The WC shines if I'm blasting through twisty singletrack. Compared to the regular Epic, I can feel better acceleration and power transfer from its shorter, thicker chainstays. Its a flickable bike that favors an aggressive riding style. The WC is built like a fighter jet. It wants to turn. Pressure on the handlebars or lean, and it will turn. This is a bike that needs constant attention, and on days when I'm not riding well or had too much to drink the night before, I'll find it twitchy. It's not really the bike for long days when you want to put the bike into auto-pilot and cruise.
 |
| Specialized S-Works Epic World Cup 2014 |
 |
| Specialized S-Works Epic 2012 |
Update Mar 19: I got a chance to ride a 2015 S-Works Epic today. Everything I said about my 2012 remains true with the 2015 version, except the 2015 is even more stable, and stiffer. I don't know what it weighs, but it is surprisingly light, considering it has a dropper post, 2x11drivetrain and RS-1 fork.
Friday, January 23, 2015
EVEREST: Realizing The Dream 2
Please join me at the National University of Singapore Mountaineering Club on Friday 30th January 2015 at 7pm at the SRC (Sports and Recreation Club) Conference Room, where I'll be giving a talk on climbing Everest. I'll talk about gaining the experience you need, as well as how to physically prepare your body for the challenge in the most time efficient way possible to get you to the top of the highest mountain on earth.
Subscribe to:
Posts (Atom)