Adventure Nomad

Adventure Nomad
Showing posts with label Bike. Show all posts

Friday, October 13, 2017

Biking Bromo


FullSizeRender 7 copy 2
Batu, East Java.  One of the trails we rode on this trip.  Photo by Nina FiztSimons

I made a second trip to Mt. Bromo, Java, Indonesia last week.  Unlike the first trip, where we went at the end of the wet season/beginning of the dry season in April, this trip was made smack in the middle of the dry season.  Although the trails were dry, the tradeoff was the dust, and that Bromo Classic trail, which rides across the sea of sand, was too soft to ride.

FullSizeRender 10
Another one from Batu, East Java.  Photo by Ramang Kristian
This trip, most of the riding we did was cross-country, adventure-biking, done downhill style.  Short downhill sections, followed by a vehicle transfer uphill to a different trail.  After our 3 day trip though, we all felt that we spent too much time in the car for the amount of riding we did.

IMG_5998
5cm Trail, Mt. Bromo.  Photo by Ramang Kristian

Unless you like riding a lot of downhill and don't mind spending time in the car to be shuttled uphill, a better way to do it would be what we did the first trip (see the video below).  We stayed in a primitive homestay at Cemoro Lawang (not recommended, try to find a hotel or upmarket homestay), and on some days, either started the ride from the accommodation, or ending there.  Transfers on the vehicle were far less than on this trip.  Best time to go would be the April-May, which is the end of the wet season/beginning of the dry.

FullSizeRender 8 copy
Stream crossing, Batu, East Java.  Photo by Nina FiztSimons
Stream crossing, Batu, East Java.  Photo by Nina FiztSimons[/caption]
If you are wondering why there are so many photos of me, and none by me, it's because the memory card on my Sony RX100 crapped out and I didn't bring a spare.  Duh!

FullSizeRender 9
Coffee, Java style!  Photo by Ramang Kristian

Here's the video from my previous trip to Mt. Bromo:

Riding Mt. Bromo from Kenneth Koh on Vimeo.

Friday, June 24, 2016

Shooting Bali Rides

Cool!  I was invited to Bali to ride and shoot a video for Nina FiztSimons and Ramang Kristian who own and operate Bali Rides.  I got to invite four of my friends down for this four-day gig, so I asked my wife, Laura, and long-time collaborator Aloysius Wee, President of the Kuala Lumpur Mountain Bike Hash Scott Roberts, and GoPro Distributor for Malaysia Khoo Boo Hian along for the ride.


As usual, the riding was superb.  We got to ride new singletrack, including a moderate downhill track, which was about the maximum I could handle with my XC bike.  The weather held up all four days, and the views were stunning!  If you get a chance to go to Bali, give these guys a call.

I took what I thought was a minimum of gear for the shoot, but I've learned that I can pare it down even further.  For my style of shooting, here's what I think I need:

Main Camera: 
Sony A7sii.  Full frame for shallow depth of field.  Shoots insane low light.  Useable video autofocus.

Lenses:
Zeiss 24-70mm f/4.  Relatively compact and lightweight.  A good general purpose lens.
Sony 10-18mm f/4.  Useable full-frame at about 16mm for ultrawide and timelapse shots.  Also restores wide to normal perspective at 100fps at which the a7sii crops in 2.2x.

GoPro:
Hero 4 Black.  For POV, drone shots, and anything that is going to get wet.
Essential mounts: Vented Helmet mount, Chesty, Jaws Clamp, tripod mount, Selfie stick.

Tripod:
I use a tiny Slik Sprint Mini with the center column removed and a Really Right Stuff compact ballhead bolted directly to the legs.

Drone:
DJI Phantom.  I'm still using the original Phantom with a cheap gimbal.  I've two minds about using a drone.  On the one hand, the drone is bulky, heavy and a pain to carry, set up and fly, but on the other hand, it gets shots like nothing else can.

Sound:
Rode VideoMicro on camera.  I used this for the interview with Scott and also for the temple shots, but I should really use it all the time instead of the built-in mic.  For really light weight adventures, I'm going to leave my wired lavalier mic and Zoom H1 recorder at home.

Slider:
Ratrig Mini 35.  Never used.  There just wasn't time to set it up.  All the sliding shots you see in the video are hand held and stabilized in post.  That proved to be good enough for me to leave the slider at home for light weight travel.

Thursday, February 18, 2016

The 10 Commandments of Lifelong Fitness

Aging sucks!  There really is nothing good about growing old, except maybe I'm not so hot-headed and my ego is kept in check... Everything else, not so good.  Starting with this blog post, I've added a new 'Aging' category, to share what I've learned with you.

Ned Overend, one of my guru's on the subject, a man who manages to stay on top of his game, regardless of age, talks about how he keeps in shape in this Outside video:

Tuesday, February 16, 2016

Burma Rising

Balloons over Bagan, Myanmar.  
Myanmar, also known as Burma, is a country of contradictions.  It's a land of jaw-dropping beauty and a people who have endured decades of oppression and hardship. Until recently, it was isolated from the rest of the world, and its unique culture has survived the 21st century relatively unscathed.  Burma is rapidly catching up with the 21st century, and not all of it good.  Certain technology, like cellphones, is cheap, and even poor farmers have smartphones and can be seen texting from atop water buffaloes.  Plastic bags litter the landscape, as basic needs like trash disposal, health care, and infrastructure (power, roads, etc) are either practically non-existant.  Buddhism plays a major role in the country, providing a system of basic education, health care and a moral code for the people.
A monk grabs a photo with his cellphone at the Temple of 582,000 Buddhas, Thanboday, Myanmar.
My wife, Laura and I were there for some biking and photography/filming.  Laura is recovering from a slipped disc and was not sure how much biking she could do, and so we opted to take a supported tour from a local operator.  This turned out to be a good thing, because her back was far from recovered.  We flew into Mandalay, and visited Bagan and Inle Lake.  We also visited Yangon from an earlier trip, and clips from that trip are also included in our trip video below.
End of the day, Bagan, Myanmar
We didn't have much information on biking when we planned our trip, and we didn't know how much biking Laura could do, so we wrote to a couple of companies and asked if they could take us to the places we wanted to see, and to do some biking as well.  All the biking was planned on road, usually tarmac, but occasionally some dirt road.  The paved roads were extremely busy.
Fisherman, Inle Lake, Myanmar
Our guide was extremely accommodating, and although not a mountain biker, took it upon himself to find more dirt roads to escape the traffic.  I experienced the graciousness of the Burmese people, saw the beauty of the land, and came away with a feeling of hope for the country.


Burma Rising from Kenneth Koh on Vimeo.

Best time to visit is in the Burmese winter.  It's cool and dry in the mornings and evenings, and the quality of light for photography is amazing.  We find prices to be on the high side for South East Asia.  Hotels and transport are expensive, probably to some sort of government tax, and food and labor are relatively cheap.  Exchange your currency (new, large note US dollars are preferred!) in Burma, and buy a SIM card for your phone at the airport.

Monday, December 21, 2015

Top 12 Bikepacking Videos of 2015


I'm stoked to have my video make Bikepacking Magazine's 12 Best Bikepacking Videos for 2015.  I'm honoured, and also humbled, to share this accolade with so many well crafted short films.  It's really motivating for me to further my craft.  I can't wait to make the next one!

Thursday, September 10, 2015

Tools for Bike Travel

I travel often with my bike, and I can't travel with all my tools when I fly with my bike.  To save weight, I bring a minimum of tools, which I keep in a little travel tool box.  These are an addition to the typical bike tools that you should always have with you, like a bike multitool, pump and tire levers.  These are the tools I may use to assemble my bike at the destination, then they stay behind with my bike box or in the car.  Here are some tools you should consider bringing with you when you travel with your bike.

Ritchey 6-Bit Bicycle Torque Key
1. Ritchey 6-Bit Bicycle Torque Key
Carbon parts and titanium bolts require some care to fit.  Both over and under torquing the bolts could affect the ride, and shorten the life of the parts.  I love the Ritchey 6-Bit Bicycle Torque Key as it's compact and lightweight, and really fast to get bolts on and off with the 'spinner'.  I use the 5Nm preset mainly for my stem faceplate bolts, but I think it's also a good 'general' use torque, and better than my 'feel'.

Topeak D2 Smartgauge

2. Topeak D2 SmartGauge
Getting consistent tire and shock pressures is one key to riding better.  I use a floor pump at home, but I don't bring that when I travel.  This gauge can check tires, front and rear shock pressures.  I do bring a travel tire and shock pump, but I can use whatever pump is available to me, and still maintain consistent pressures.

3. Park Tool HR-8 Hex Wrench (8mm)
It's easy enough to get a pedal on with a bike specific multi-tool, but after a long ride, it can be tough getting the pedal off if you cannot apply enough torque.  One solution is to throw a long-armed 8mm allen key into the travel kit.  I use mine to get the pedals on, and it stays with my bike box until I return to take the pedals off.

Leatherman New Wave

4. Leatherman New Wave Multitool
A bike specific multi-tool comes along with me on every ride, but a general purpose one, like the Leatherman Wave pictured above, can be a useful addition to the travel kit.  I use a tool like this to cut up and pull out the staples on cardboard bike boxes, slice fruit and duct tape. The little screwdriver can be useful for sunglasses, the file used to deburr sharp edges after a crash, and the pliers useful for taking apart power links. I've heard of the saw being used to cut up some wood to rig up a chain guide for a single speed conversion when the derailleur broke.  It's mainly a basecamp/hut/car tool as it's too heavy to take along most rides, but I sometimes carry a smaller/lighter tool on epic rides.

5. Old Inner Tube
If you have an old inner tube that is no longer useable as a spare, throw that in with your travel kit.  They can be cut up to use as shields or shims to protect your frame, rubber bands, GPS retainers.  I have also seen them used with tent pegs as a splint for a broken frame.

Wednesday, September 2, 2015

Bali Rides Again

Destination: Bali, Indonesia
Activity: Mountain Biking
Season: Mid-June through Mid-September
Operator: Guided, with bali-rides.com
Cost: Low to Moderate

Back again to Bali for some mountain biking.  I'd been cooped up for the past few weeks video editing at my computer and needed to kick start my training and get some biking in. A change of scenery is great motivation, so I contacted Ramang Kristian of Bali Rides to see if he could fit me in for a multi-day ride.

Mt. Abang to Telaga Waja River Ride.  Photo by Bali Rides/Ramang Kristian

Ramang arranged 6 days of riding for me.  3 days on, a day rest, followed by another 3 days of riding.  It was a no-hassle trip.  Bali Rides arranged everything from the airport pick-up and drop-off, all meals and accommodation.  Bali Rides' airconditioned rooms were all full, so I stayed in the non-airconditioned bamboo hut - Simple, rustic and comfortable, although a little noisy in the early morning.  One balinese massage was also included in my package.

Bamboo Hut at Bali Rides B&B

Each ride was about 42km, and mostly downhill, but had an average of 550m of total climbing.  Technical difficulty ranged from the easy, but scenic Ubud loop, to intermediate trails like the Abang to Mengwi trail, easily the best ride in Bali with small techy drops, swooping singletrack, and breathtaking views.

Riding the beginner Ubud Loop trail through rice padi fields and coconut trees.  Photo by Bali Rides/Ramang Kristian.

Costs are low to moderate, depending on where you come from.  A day ride will cost IDR1.1 million (USD$78, SGD$110), which includes the guided ride,  hotel pickup and dropoff, lunch and snack, and full-suspension bike rental (Specialized carbon Epic 29ers or carbon Stumpjumpers - really good rental bikes!).  Multiday rides are all custom arranged.  Contact bali-rides.com for a quote.

I just wanted to ride, so I didn't shoot any photos or video this trip.  But here's a video from my first trip with Bali Rides.  The riding is pretty typical, but we chose to stay at different hotels to get to see more of Bali:


Updated 25 June 2016 with a new video I shot for Bali Rides.

Friday, August 21, 2015

Mountain Biking Telluride to Moab: The Ride

Continued from the last post:

When we got to Moab, we met up with some friends and did a couple of rides.  It always seems that we don't spend enough time in Moab, because before we knew it, it was time to depart for Telluride, and begin the trip trip that we had come all this way for: Riding two hundred something miles from Telluride to Moab, using San Juan Hut Systems huts along to way, so that we could ride with light packs and enjoy the riding!

A photo posted by Ken Koh (@adventurenomad) on


San Juan Hut System is the only destination (ie. Telluride to Moab; Durango to Moab) hut to hut based system in the US.  It allows a biker to really get deep into the backcountry by eliminating the need to carry tents, sleeping bags, cookware and food for 7 days of riding.


Oh, yes!  This is one ROWDY Ride!

If you've ever thought about doing one of these rides, this short video should give you a good idea of what to expect:


Mountain Biking Telluride to Moab from Kenneth Koh on Vimeo.


Having done the similar Durango to Moab ride a few years ago, we kind of knew what to expect.  While there's still a fair bit of dirt road and a little paved road, this ride had more singletrack.  In fact, so much more singletrack that we simply could not ride all the singletrack options.  Lucky for us, they were options, and when weather or our bodies had enough, we could take an easy dirt road ride to the next hut.


I've been to Moab 4 times over the years.  Once in the Spring, once in the Fall, and twice in Summer.  I definitely want to return, because there's just so much more riding to do, but I won't be going back in Summer.  It's too hot and just too crowded.

If you were deciding on which of the two hut to hut rides to pick, I'd say go with the Durango to Moab Ride if you're riding for the scenery and views.  If you like more technical riding, pick Telluride to Moab.  Either way, you won't be far wrong.  One of these rides definitely belong on every mountain biker's bucket list!

Mountain Biking Telluride to Moab: The Drive Up


It's a long way to get to Moab - It's along trans-pacific flight, followed by a long drive from California to Utah.  We've found that by following the bodies natural sleep cycle, and by getting a lot of sunshine during the day, the drive up can be a good way to acclimatise as well as take in a lot of the sights.

Horseshoe Bend, Arizona, enroute to Moab, Utah.
Arriving into the USA after a big transpacific flight has always been a pain, but arriving into Los Angeles this trip has been my most pain free so far, thanks to the new ESTA immigration clearance, available for selected countries.  As usual, our plan was to get out of the airport as quickly as possible, then drive for as long as we could, usually a couple of hours before needing to stop for sleep.  Our destination this trip, was Moab, in Utah, where we were heading up to do some mountain biking.  We've found that due to time zone changes, we are usually up very early, by 3 or 4am, and so we make use of that time taking the bikes out of their boxes and assembling them.  We hit the road about 5am, or just before daybreak, and stop for breakfast along the way.  By breaking up the drive, can taking in a lot of sunshine, we adapt faster to the new time zone.  We took in as many sights as possible on the drive up by heading out onto Historic Highway Route 66... 

A photo posted by Ken Koh (@adventurenomad) on

The next day, we made it to Panguitch, Arizona, where we got to ride Thunder Mountain Bike Trail, which was an unexpected treat!  Great riding, really awesome scenery!  After the ride, we took a drive through Bryce Canyon National Park, and took in a short hike.

A photo posted by Ken Koh (@adventurenomad) on

The highlight of the drive up to Moab was Page, Arizona, which we reached the evening after leaving Bryce Canyon NP.  We stayed for 2 nights and visited Antelope Canyon, Waterholes Canyon and Horseshoe Bend.


The evening after we visited Antelope Canyon, we reached Moab.  By this time, we were fully acclimatised and ready to ride!

To be continued...

Monday, March 16, 2015

Specialized Epic vs. Epic WC

This is a discussion on the Specialized S-Works Epic vs. the S-Works Epic World Cup, and maybe help you to decide which one is right for you.  I'll be comparing older models and not the current 2015 bikes, but you might find the information still relevant.

My 2012 S-Works Epic is the best bike I have ever ridden (it's the bike that won Olympic gold in 2012), but it was heavily used, and I needed to replace the bike in 2015.  In 2014, Specialized split the Epic model into two sub-categories to fit different rider needs:  The normal Epic for marathon riding, and the WC (World Cup) for fast XCO type courses.  The WC is stiffer, has slightly less suspension travel (95mm vs. 100mm) and is strictly a 1x drivetrain as it does not have a mount to attach a front derailleur.I got a deal on a 2014 Epic WC and went with that.  The 2015 Epic WC hasn't changed much from the 2014 model that I ride, but the 2015 regular Epic has some pretty significant changes from the 2012 model that I rode, including a new upside down fork, 2x11 drivetrain and the addition of a dropper seatpost.
The late Burry Stander signing my 2012 Epic frame
The frame for the 2014/15 Epics saw a significant change from the 2012/13 models to intergrate what Specialized called SWAT (Storage water air tools) into the frame.  I really like this, especially the ability to hold 2 full sized water bottles, even on a size Small frame.  But in order to do this, they had to make some geometry changes.  My Specialized bike fit, (courtesy of Specialized Asia Pacific), saw me on a size Small 2014 frame, with a longer stem and offset seatpost, compared to my 2012 Medium frame Epic with a shorter stem and a non-offset seatpost.  The weight of my Size M 2012 Epic, with some tweaking was 10.0kg (without pedals).  My size S 2014 Epic WC weighs 9.6kg (without SWAT kit, without pedals).  Note:  My WC is modified with the 2013 S-Works crankset to enable me to fit a 30T  (or 28T) chainring. 

Specialized Asia Pacific's VJ Varada dialing in the fit on my 2014 Epic WC
I crashed my Epic WC the first time I rode it, as a result of an improper suspension setup and an over enthusiastic rider ;)  The 5mm difference in suspension travel between the WC and regular Epic doesn't sound like a lot, but you can really feel the difference in drops and rock gardens.  It is a much firmer feel, and combined with the quicker steering geometry of the WC, I find myself slower than my old Epic going down drops.  The WC shines if I'm blasting through twisty singletrack.  Compared to the regular Epic, I can feel better acceleration and power transfer from its shorter, thicker chainstays.  Its a flickable bike that favors an aggressive riding style.  The WC is built like a fighter jet.  It wants to turn.  Pressure on the handlebars or lean, and it will turn.  This is a bike that needs constant attention, and on days when I'm not riding well or had too much to drink the night before, I'll find it twitchy.   It's not really the bike for long days when you want to put the bike into auto-pilot and cruise.  
Specialized S-Works Epic World Cup 2014
I like to think of my regular Epic as a bomber jet.  It is stable, forgiving, confidence inspiring.  It is a bike that wants to go straight when something deflects it off course.  At the top of something gnarly, and I find my vision closing in on my front tire, I can trust my regular Epic to get get me out of trouble.  Yes, it is slower turning, and slower to accelerate, and if I'm racing on an XCO type course where I'm only riding for about an hour and a half, and every second matters, I would prefer to take my WC over the regular Epic.  
Specialized S-Works Epic 2012
The bottom line is that for most of my riding, I prefer the regular Epic.  The Specialized Epic for 2015 sees some very exciting changes, and look awesome.  Hopefully, I'll get to ride one over the next couple of weeks, and I'll update this post if I have anything to add.

Update Mar 19:  I got a chance to ride a 2015 S-Works Epic today.  Everything I said about my 2012 remains true with the 2015 version, except the 2015 is even more stable, and stiffer.  I don't know what it weighs, but it is surprisingly light, considering it has a dropper post, 2x11drivetrain and RS-1 fork.  

Friday, August 8, 2014

Switzerland Mountain Biking

My wife, Laura, and I were supposed to go mountain biking in Switzerland last year.  Our goal was to ride the complete Swiss Alpine One Mountain Bike Trail, which at 666km, is the longest signposted mountain biking trail in the world.  However, we could not get our heads around how expensive things were in Switzerland and how much that trip would eventually cost us.  So that plan was axed.
Refuel stop at 'Le Cafe', somewhere along the trail... Taken with an iPhone 4s
This year, when we found out that Scott Roberts and a bunch of Malaysian riders were going, we wangled our way into the trip.   Scott's our Swiss bike guru, having made trips out there at least once a year for the last decade.  He knows the ins and outs of the place, and how to keep costs down.  This year, he planned to bike the Haute Route from Chamonix, France to Zermatt, Switzerland.  Sounded like fun, but what we did not realize, was that he planned us on the hiking route, not the bike route.  Check out the video below and you'll see what I mean!


Switzerland Mountain Biking from Kenneth Koh on Vimeo.

Thankfully, the weather turned on us, and the high passes that we would have to cross had a lot of fresh snowfall on them, and we would not be able to cross them to make our way to Zermatt.  We changed our plans, took a train down to the southern town of Lugano, where the sun was at least shining, and it was warm.
Taking a break along Bike Trail 329 out of Klosters, Switzerland.  Taken with an iPhone 4s.
When the guys left, Laura and I still had another week in Switzerland, which we spent at her sister's place in Klosters.  The weather cleared up, and as you can see in the video below, we had a great time there as well.


Switzerland Mountain Biking: Part Deux from Kenneth Koh on Vimeo.

We learned a lot from this trip, but the main thing was that Switzerland IS expensive, and there is no getting away from that.  But what you get for your money are great biking trails, awesome mountain scenery, and renown efficient Swiss trains for getting around the country with your bike.  And yes, in case you are wondering, we will be heading back to complete the Swiss Alpine One Mountain Bike Trail!
Goodbye Switzerland... But we'll be back!

Sunday, February 23, 2014

Mae Hong Son Circuit

I love January in Northern Thailand.  The weather is just about perfect, and feels a bit like Southern California - dry, cool in the shade and warm in the sun.  The holiday crowds have mostly gone, and there is a nice, laid-back atmosphere. 


My wife Laura, and I set off to ride our road bikes on the Mae Hong Son Circuit, which starts out of Chiang Mai, the second largest city in Thailand, and loops to the north.  It can be done clockwise or anticlockwise, but if you are going by bicycle, I would suggest doing it anticlockwise.  That saves the option of going over Doi Inthanon, Thailand's biggest peak, for last.

Getting a flight into Chiang Mai is easy, but getting the bike boxes to the hotel may be a bit of a challenge if you are new to Thailand.  The easiest way is to arrange transport with your hotel and let them know you have bike boxes.  We just flagged down a 'Song Thiew' at the airport.  Technically, they are not supposed to pick up passengers, but security guards can be understanding when they see you've got oversized bags that won't fit in the standard transport options from the airport.
Baan Rai Laana Resort, Mae Taeng, at the end of Day1. Image taken wtih iPhone 4s

We like to stay in 'Old Chiang Mai', within the moat of the old city.  There are numerous hotels there.  We like using the 'Old Canal Road' as an option to stay off the highway getting out and coming back into Chiang Mai.  We try to stay off the main roads, using backroads as much as possible.  I planned the route on 'RidewithGPS' and transfered the route onto my iPhone, using Gaia GPS to navigate enroute.
Breakfast in Pai. Image taken wtih iPhone 4s

Our anticlockwise route took us from Chiang Mai to Mae Taeng, Pai, Mae Hong Son, Khun Yuam, and Mae Sariang.  From Mae Sariang, we wanted to proceed to Mae Chaem, and over Doi Inthanon to get back to Chiang Mai, but we took an easier option to ride via Hot back to Chiang Mai.  You can find the planning for this trip on RidewithGPS.
Morning mist over Chong Kham Lake, Mae Hong Son. Image taken wtih iPhone 4s

It's good to do a little research before the ride so you can plan out where to take your rest days and what you might like to do.  I like Pai and Mae Sariang as good places to break the journey.

We used regular road bikes with Revelate Designs bags.  I find this setup ideal for light and fast tours.  Now that Laura and I no longer have plans to do long distance touring, we have sold our Surly LHTs and panniers setup.  The only change we would advise is to use a cassette with larger cogs.  We used a compact crankset (50-34) with an 11-28 cassette and had to push up a few steep bits.  The next time we take our road bikes out on tour, we'll fit them out with 11-32 cassettes.

You'll be stopping in places where they don't see many foreign tourists, so its good to learn a few words and numbers in Thai:
Hello - Sawadee Krup (Ka, feminine)
Room - Hong
Water - Nam
Toilet - Hong Nam
Not spicy - My Pet
Ice Coffee - Cafe Yen
One - Neng
Two - Song
Three - Sam
The Old City Gates of Chiang Mai. Image taken wtih iPhone 4s

The Mae Hong Son Circuit is a good one for more experienced and fit riders.  We suffered our fair share of mechanicals, food poisoning, lack of fitness. We'll probably go back and do it again;)  Distances are about 100km with about 2000m of climbing each day.  The roads get busy near Chiang Mai and Pai, and there isn't much of a shoulder to ride on.   For an easier road tour ride in Thailand, check out my blog post on riding bike touring Phuket.


Wednesday, September 11, 2013

Tour de Timor 2013: The Magic is Still There!

Team Air Timor (Myself, Laura Liong, Anche Cabral, and Alvin Lim) celebrating our 1st Place Mixed Team victory after the 2013 Tour de Timor

The 2013 Tour de Timor is over!  How did it go?  Well, the 2013 Tour de Timor was marred by controversy even before the race started, as the original organizers were effectively kicked out and shut out of the event by the new race organizers, the Tourism Office of Timor Leste.  Given the uncertainty of the quality that the new organizers could bring to the event, many international racers did not come this year.  To top that off, local racers who had signed up for the race staged a protest at the start line, and refused to start.  That left only a small field of about 60 competitors in total who started the race.

Well, the fledgling organizers got a lot of things right, like the logistics.  The food was plentiful, toilets and showers were adequate, and our luggage was moved efficiently.  The organizers also engaged Russ Baker to do the timing.  Russ has been doing the timing for the Tour de Timor since it's inception, and the accuracy of his timing maintained the integrity of race standards.

There were a number of things that could be improved.  Communication is a big one.  Race safety is another.  In previous Tour de Timors, roads were closed.  In this year's event, some roads were closed, and some were open, only this wasn't communicated to us.  This was probably my most dangerous race by far, and I had a couple of really close calls, one of which was while squeezing pass a truck at high speed on a bend, and being surprised by a motorcycle, and then a donkey behind that! 

While water was plentiful during the ride, it was somewhat random, sometimes just handed to us from a moving SUV.  Position of Aid Stations could not be relied upon, and were often not marked. 

I get the feeling the organizers learn fast, as mistakes made during the first couple of days were quickly corrected, and improvements made in the following days.

Sure, we were lucky to get a good result this year, but what really makes the Tour de Timor special is the landscape and the people.  For me, that's what makes the Tour de Timor such a magical experience!


Tuesday, June 25, 2013

Bali Rides

I've been around a bit for various types of 'adventure' trips, sometimes guided, sometimes not.  Every once in a long while, I'm lucky enough to find a top-class guide.  Ramang Kristian from Bali Rides is one of those guides.  Needless to say, we had a great trip.  The rides were great, transport and accommodation more than comfortable, and we were well taken care of with plenty of snacks and drinks.  Ramang showed us the riding around Bali the way only a local can, with hidden singletrack and bits of local culture and sights thrown in.


Our seven day trip had about 42km of riding, with about 600m of climbing each day.  Every trip is customized to the riders skills and fitness, so if you want to ride more or less, technical or easy, it's up to you. The video above should give you a good idea of the type of riding there.
Riding in rice fields with Mt. Agung
Bali is an island just east of Java, Indonesia, with a few active volcanoes.  The soil is rich, and the landscape is lush.  On Day 1, we started up on the crater rim of active volcano, riding the slopes before dropping down into the lava fields, finishing on the shore of Batur Lake, where we took a dip in a local hot springs.  Sadly, my footage of the lava fields and hot springs were lost.  I can only say that they were both very special and spectacular.
Fishing boat returning to shore after a night out at Amed, Bali.
Each riding day offered something different.  On Day 2, we finished our ride on the white sands of... White Sands Beach, where we took the opportunity to wash off the grime of the day with a quick swim.  Day 3 ended with a nice massage, courtesy of Bali Rides.  We had one rest day on Day 4, which we spent in Amed and took the opportunity to dive the famous Liberty Wreck.  We spent each night in a new location, and got to experience the uniqueness of a new place each night. 
Leaving the hotel in Sanur for the day's ride...
The last day was very special.  Although it was supposed to be dry season, we had quite a bit of rain during the trip, but the last day was super sunny, and the ride ended with a delicious BBQ at Ramang's beautiful Balinese house, cooked by Ramang's mum and sister, who were visiting at the time!
Google map of our first day's ride
The best time to ride Bali is during the dry season from June through September.  Contact Ramang at bali-rides.com for more information.

Update 25 June 2016:
Updated with a new video I shot for Bali Rides this week.

Monday, June 10, 2013

Riding Mt. Bromo

Last week, a couple of friends (Chow Kok Yeang from Malaysia and Ramang Kristian from Bali) and I got together on the island of Java, Indonesia, to ride the volcanic trails of Mt. Bromo.


At 2,329 metres (7,641 ft), Mt. Bromo sits inside a caldera called the 'Sea of Sand'.  It's the most famous, but it isn't the highest or most prominent peak there.  Gunung Batok (or Mt. Batok) is the most prominent peak in the caldera, and the peak is easily confused with Mt. Bromo.  Gunung Semeru, visible a little further away, is the highest peak on Java.

The best time to go is during the dry season from August through November.  Mid-August, the transition between the wet and dry seasons, is the absolute best.  That's when the sand is still compact with moisture from the wet season, but the weather is dry and skies are blue.  I went last week, and was lucky with the weather that it didn't rain on us, but had some overcast and cloudy days so the views weren't as good.
Mt. Bromo is the one puffin' smoke. Gunung Batok is the big one to its right.
We flew in to Surabaya, the second largest city in Indonesia, and from there, it's a 4-5 hour drive to Cemero Lawang, the base for exploring Mt. Bromo.  Cemoro Lawang is at 2217m, so although it's in South East Asia, it does get pretty chilly at night.There are a few small hotels and simple homestays in Cemero Lawang.  We stayed in one of the local homestays, but the Lava Cafe Hostel looks pretty good.  The food is decent at Lava Cafe and there's free WiFi.  Otherwise, there are a few small local eateries where meals $1 and up.
Meals start from about USD$1...
The riding itself was good.  The first day, we rode the 'Bromo Classic Track', which includes the 'Sea of Sand' through 'Teletubbies Hill', up 'Jembalong Hill', 'New Zealand' Trail, 'Kechiri Hill' and back down to the 'Sea of Sand' to Cemoro Lawang.  The second day was a fast downhill ride through various farming tracks; and Day 3 was the famous B-29 singletrack, which was supposed to be über scenic, but we got clouded in.  The video should give you a good idea of the type of riding you can expect.

My Sandman Hoggar fatbike is the near perfect bike for Mt. Bromo, not only because the additional float and traction was welcome on the sand or down the steep, slick, muddy trails, but the tough titanium frame proved impervious to scratches as the bikes were crudely strapped onto the back of a pickup. 
Some enterprising kids took our bikes down to the river to wash.  I guess child labor and environmental laws are different here ;)
We engaged a local guide at very reasonable rates, and although you don't need one if you have the GPX tracks and a GPS, it simplifies logistics as the guide can probably arrange accommodation and transportation cheaper than you can.  If you need a guide, I can recommend our guide, Anom, who can be reached at anomharyawicaksana@gmail.com.  Alternatively, Ramang from Bali Rides can arrange a high quality trip to Mt. Bromo for you. Contact Ramang at ramang_kristian@yahoo.com


Friday, May 17, 2013

Sandman Hoggar Fatbike Review

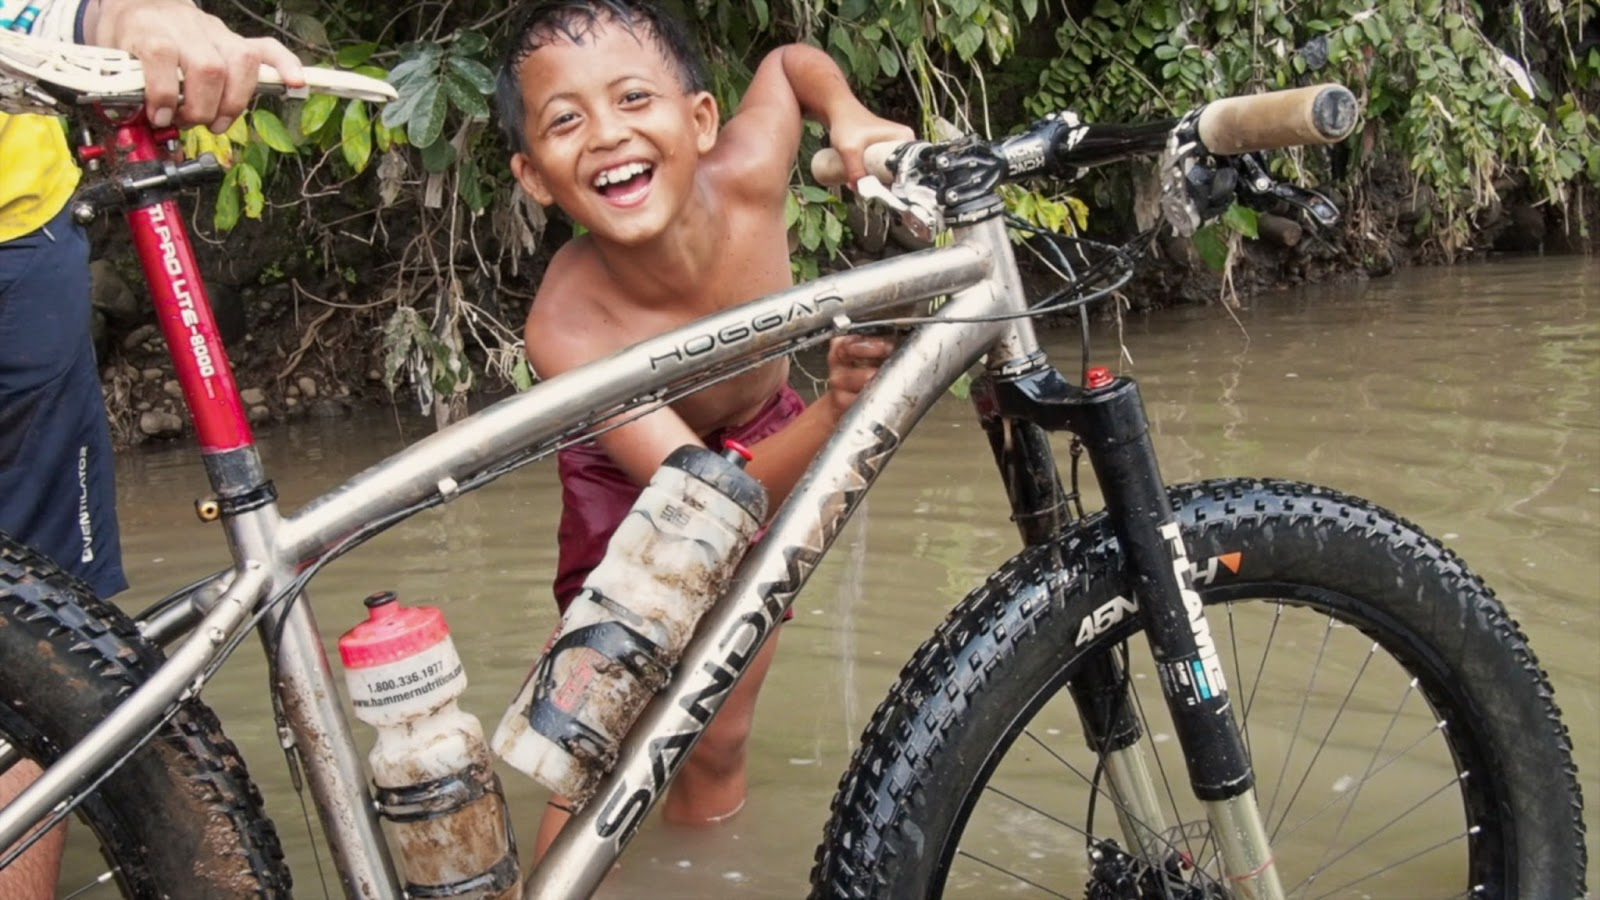
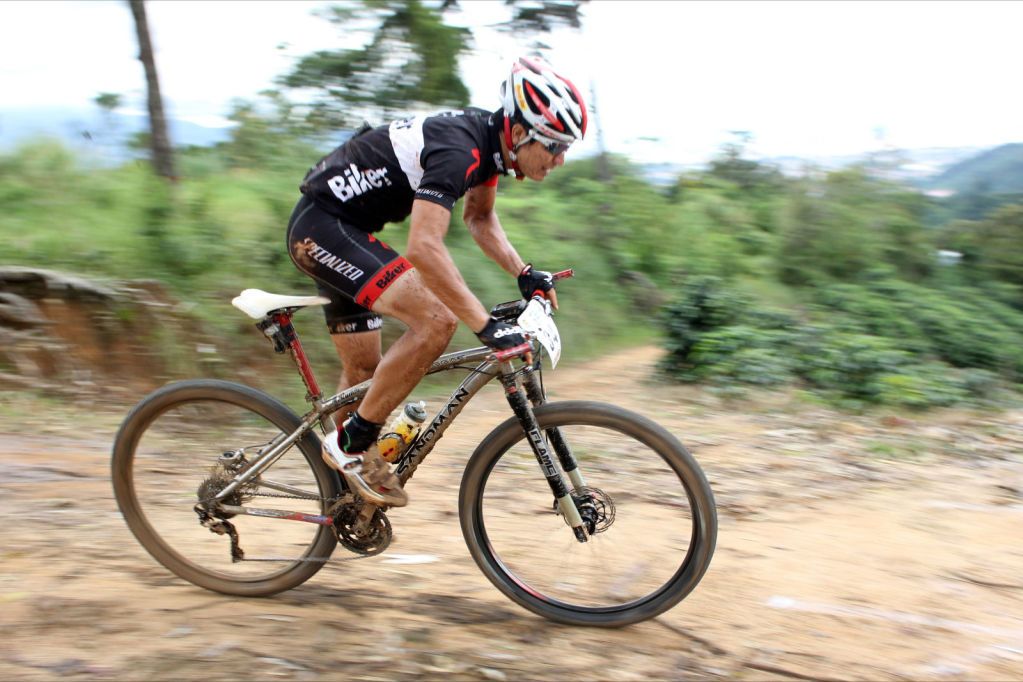
'Instagramed' pic of my Sandman Hoggar
Is a fatbike a snowbike, and if so, what is a snow bike doing on a sunny, tropical island like Singapore?

What's a Fatbike?
A fatbike is a bike with a frame and fork designed to use tires around 4" or wider.  It requires wider rims, hubs, and bottom bracket. 

The Fatbike is an Adventure Bike
My interest in fatbikes peaked when a friend of mine, Joe Cruz, toured the length of South America on a fatbike, the extra floatation and traction from his 4" tires allowed him to ride on trails that a walker would find challenging.  That opened up my eyes to the types of trails I could ride with a fatbike, and to the endless possibilites of where I could take it.

Joe Cruz riding his fatbike in South America.  Photo © Tom Walwyn.
The Fatbike is a Trail Bike
Then it occurred to me that a fatbike might actually ride quite well on the local trails we have here in Singapore.  Because of our population density, our trails are heavily used, and because of continued riding during the rainy season, the trails are badly eroded, creating steep, loose-rutted conditions and exposing slippery wet roots and rock.  As a bonus, a fatbike distributes the weight over a bigger surface, and skids less (depending on how you ride it) and so may possibly contribute less to further trail damage and erosion.

Enter the Sandman Hoggar
When my wife sent me a video of the Sandman in action (below), I knew I had found my fatbike.  Not all fatbikes are designed to be snowbikes.  Sandman designed their bikes from the ground up to be trail bikes.  My Sandman Hoggar is a titanium frame that is designed to use and comes complete with a front suspension fork designed for fatbikes.


Why Sandman. from Martín Campoy on Vimeo.

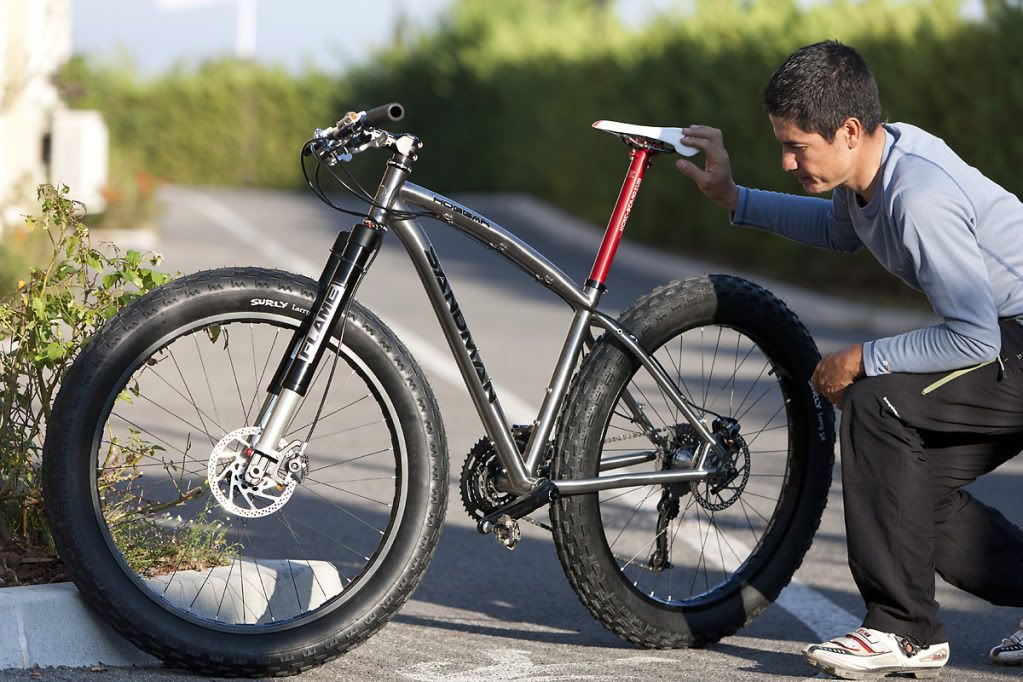
Aesthetically, my size small Sandman Hoggar has very pleasing lines, with an upward curving top tube that transitions seamlessly into the seat stay.  I'm about 1.7m (5' 7") with a bike inseam of about 31", and once or twice, the top tube has gotten in the way of a dismounting on extremely steep descents, but mostly, standover clearance is not affected. 
Sandman sponsored rider, Milton Ramos, admiring his Sandman Hoggar.  Photo courtesy Sandman Bikes.
Sandman worked out a 'racers package' for me where I bought the bike, without a lot of the beefier (and heavier) All-Mountain parts.  My complete Sandman Hoggar weighs 13.2kg (29.1lbs) with Husker Du tires, ultralite tubes, Crank Bros Candy pedals, XT brakes, Sandman racing rear hub, and ultralightweight KCNC and Mt. Zoom parts from Conticomponents and XCRacer.  It's a racy setup, and light for a fatbike, especially for one with front suspension.

The 90mm travel suspension fork is made in Germany by Answer.  It's an upside down fork that uses a 20mm through axle.  It's stiff as hell, but is a bit of a pain to set up.  It's still fairly new, and has a lot of stiction.  I'm still experimenting running it with different pressures.
Gabriele Incuria borrowed a Hoggar and won the hardtail class of the Italian Superenduro series. Photo courtesy Sandman Bikes.
How does it ride?
Local bike guru, Poh Yu Seung took it for a spin and had this to say:

"Carves at high speed, nimble at low speed.  Flowy and instinctive.  It really opened up my eyes to what a well engineered fatbike can do." 

It's a well thought out fatbike.  Suspension might not be that important if you are using a fatbike as a snow bike, but for a trailbike, it is greatly improves handling, and Sandman is currently the only fatbike manufacturer to design a fatbike using front suspension.  As such, the Hoggar shines on most technical terrain, where I'm likely to be riding more cautiously - that includes anything loose, wet, slippery or big drops.

One reason why the Hoggar feels so agile is Sandman's choice to use lightweight 47mm trials rims on its wheels.  Although narrower, these are much lighter than the typical 65mm fatbike rim.  The narrow rims have the effect of 'rounding out' the tire profile, somewhat reducing bad tire manners that can be found on 'squarer profile' fat tires at low pressures.  It turns out that I can use ultralightweight 2.7" DH tubes which further reduce weight.  Narrow rims reduce float, so these may not be the best choice on snow, but for dirt, these are great compromise.

I keep hearing that fatbikes are 'fun', but nobody could really tell me what that 'fun' meant.  Having ridden the Hoggar for awhile, I can say that 'fun' translates into more confidence, less fear.   There's more traction in the tires, which means better grip over obstacles, and much more powerful braking on steep and scary descents.  The increased mass of spinning fat wheels increases gyroscopic force, which means more stability.  More grip, more stability equals more confidence, less fear.
Sandman sponsored rider, Milton Ramos, leading a stage at the Titan Desert Classic. Photo courtesy Sandman Bikes.
Downsides
Fatbikes don't do well on anything long, smooth and flat or uphill - like a road.  Those fat tires have a lot of rolling resistance.  This can be minimized by using higher tire pressures.  If there's any such thing as a 'fast' fatbike, the Hoggar is it.  However, in general, fatbikes are just going to be slower to accelerate and require more effort to maintain speed on the flats than a conventional mountain bike.

If the Hoggar has a weakness, it's perhaps on climbs where I need to move my butt forward and off the saddle.  Sandman won't release the Hoggar's geometry numbers, but the seat tube and head tube angles look fairly slack.  That's great for ripping it up, but combine the slack geometry with the increased weight of the fatbike and rolling resistance from the tires, and I find that I'm working quite hard when I'm climbing. 

Versatility
The Sandman has another trick up it's sleeve.  You can buy a 29er wheelset for it.  Say what?  Yes, since 4" fat tires on a 26" rim have basically the same diameter as a 29" rim/tire combination, you can equip your Sandman Hoggar with a 29er wheelset.  The Sandman does require a 165mm rear and 135mm front hub.  This gives you the option to run a lighter weight rig for the times when fat tires are not needed. Sandman has a sponsored rider (Milton Ramos) and he's been racing quite successfully on a Sandman Hoggar running a combination of fat and 29er wheels.  Having both a fat wheelset and a 29er wheelset increases the versatility of this bike.  Essentially, by using two wheelsets, you have two bikes: a front suspension fatbike, and a 29er hardtail.
Milton Ramos racing the Sandman Hoggar using a 29er wheelset.  Photo courtesy Sandman Bikes.
If you can't afford a second wheelset, but want to put in some road miles with the Sandman, you could do it with a fat road tire like the 26" Schwalbe Big Apple 2.35.  Those tires fit fine on the Sandman's 47mm 26" rim, but will lower the whole bike a bit, and quicken the steering. 

Who's the Sandman for?
I'll stick out my neck and say this is a near perfect trail bike for Singapore.   Our trails are also very short in length and we don't have big hills.  Our trails are also very loose, badly eroded, and often wet with slippery roots and logs, and no sticky mud.  

If you are the sort of person who dreads riding technical sections, give a Sandman a try.  However, if you are the sort of person who covets speed and loves being in the front of the pack; or who is struggling to keep up with the pack, this may not be the bike for you.  The Sandman is a great confidence booster, but comes with the cost of more rolling resistance requiring more power and energy to pedal.  

The Sandman is also a great choice for someone who wants one bike (but with two wheelsets) to do it all.  It can be a fatbike for the winter, or trail riding; and a 29er hartail for the summer or racing.

Conclusion
I love my Sandman Hoggar.  I love the way it looks, and how it rides on technical terrain.  I'm not fast and efficient on it, so if the ride is going to be long or fast, but not too technical, I ride my other bike.  If I had a second wheelset for it (ie, 29er wheelset), the Hoggar could be my only bike.

Sandman Bikes are available direct from Sandmanbikes.be.
They come in sizes S through XL, and some models are available in a custom XS.

Disclosure: Although I paid full price for my Sandman Hoggar, Sandman did subsidize my shipping cost.

Sunday, March 17, 2013

Bicycle Tourist Gangraped in India

I am shocked and horrified by this incident.  The couple, a 39-year-old Swiss woman and her 29-year-old male companion (or husband), who were bicycle touring through central India, were apparently hunted down by 8 men to their campsite in the woods, beaten, the man tied up and the woman raped and finally robbed.  Full story here.

My wife and I bike tour by ourselves in Asia, so this raises fresh questions about safety and security with cycle touring.  We've been rather relaxed about personal safety.  In the past, our concerns have been limited to keeping our bikes, money and belongings safe; but now, personal safety is our primary concern.

I've been thinking of ways to keep safe while bike touring:
  • I think the number one item on the list should be to keep yourself up to date on current affairs and travel warnings issued by various national organizations.  For example, there's a warning issued by the Swiss on travel in India.  Treatment of women in India, and in particular sexual assault, has been in the spotlight since the brutal rape and murder in December of a 29-year-old student on board a bus in Delhi.  I'd take heed and avoid solo travel in India/Pakistan or otherwise travel in a larger group.
  • The second on the list is to avoid known trouble spots or potential problem areas.  Find out by reading the travel forums online or check with the locals or other travelers.
  • Portray a relaxed, confident attitude.  Never arrogant or aggressive.  Smile a lot, make eye contact, and always have your radar up.  If someone or a group is not smiling back or avoiding eye contact, that's a warning sign.  Similarly, if a group is staring at you, or appears to be watching you, that's a warning too.  Be kind, smile and talk to the locals.  This builds allies who may give you a warning, or perhaps talk a hostile local out of action, or perhaps shame someone with hostile intent away from acting out.
  • Number four would be to not display wealth or expensive items, like a laptop, or a lot of cash, in restaurants or in public.  
  • Number five would be to not leave town in the evening, especially after dinner.  It's too easy for someone with hostile intention to watch you, make a plan, gather reinforcements and follow you out into the darkness.
  • Number six:  Camping in Asia is usually not done.  It's too crowded and too easy to be observed.  I keep thinking back to Ned Gillette, who was shot to death in his tent while camping in Pakistan.
That's all I have for now.  If anyone has any more ideas, I'd love to hear from you.  Just post them to the comments below.  Thanks.  Peace :)

Tuesday, March 5, 2013

No Easy Day

Monk and Temple, Luang Prabang, Laos.  Taken with Panasonic LX7.

I've just returned from a 10 day bike tour with a group of friends that started in northern Vietnam, crossed over into northern Laos and circled over to the mysterious Plain of Jars in Phonsavan before ending in Luang Prabang.  We had a sag wagon with us, so if we felt the day's riding was too ambitious, we could hop in the sag wagon and call it a day.

Laos turned out to be pretty wild place, but that is rapidly changing.  The road is now mostly paved, where a few years ago, it was mostly dirt.  This bike tour could have ideally been done on our Surly Long Haul Truckers, but we sold those, and were only left with our full-suspension Giant Anthem mountain bikes to do the tour with.  Fortunately, the tough little Anthems were up to the job.

I'd heard talk about bandits in remote parts of Laos, but I couldn't have felt safer, even when I ran into the guy brandishing an AK47 on the road (see the video below).  It is a remarkable country where the road is seldom level, and seems to go only up or down.


Biking Vietnam - Laos 2013 from Adventure Nomad on Vimeo.

If you are planning a bike tour out there, consider the elevation changes, and without a sag wagon, I'd be a bit more conservative with the distance you plan to ride each day.  I downloaded Google Maps onto Gaia GPS on my iPhone and used that for Navigation, and I found that to be immensely useful.

Luang Prabang turned out to be very picturesque, and very tourist friendly.  Not surprising then that its full of tourists.  Still, it's not too bad.  Prices for food and lodging are reasonable and locals seem to tolerate the tourists.  You just need to make reservations early for the popular hotels and restaurants.  I'd go back in a heartbeat.

In terms of camera gear, I brought my GoPro HD2, Pansonic Lumix LX7, a Gorillapod Hybrid and pole for the GoPro.  I brought one spare battery each and was able to recharge each night.  I also carried a large capacity battery that I could charge USB devices, like my iPhone and GoPro off.  I'm quite happy with this setup, and this could form my ultralightweight kit for video and stills.